Showing posts with label yeast. Show all posts

Tuesday, June 24, 2014

Hawaiian Bread

I'm feeling much better than last post, which was pretty mopey. I apologize; I don't want this place to be full of negativity. But I also don't want to hide my emotions. It's about striking a balance, I suppose. So...let me tell you about my job. I'm a real baker now. Not that I haven't always been real, but you know what I mean. I get up between 4 and 5 in the morning and start whipping out scones, biscuits, and muffins. It's fast paced, time sensitive, and I love it.


A part of me can't believe that I'm doing what I've wanted to do for so long. My dreams are coming true. And yeah, it's been a lot of work, a lot of trawling through job postings and a lot of rejection. But I did it. And now, I feel like I can take on the world. 


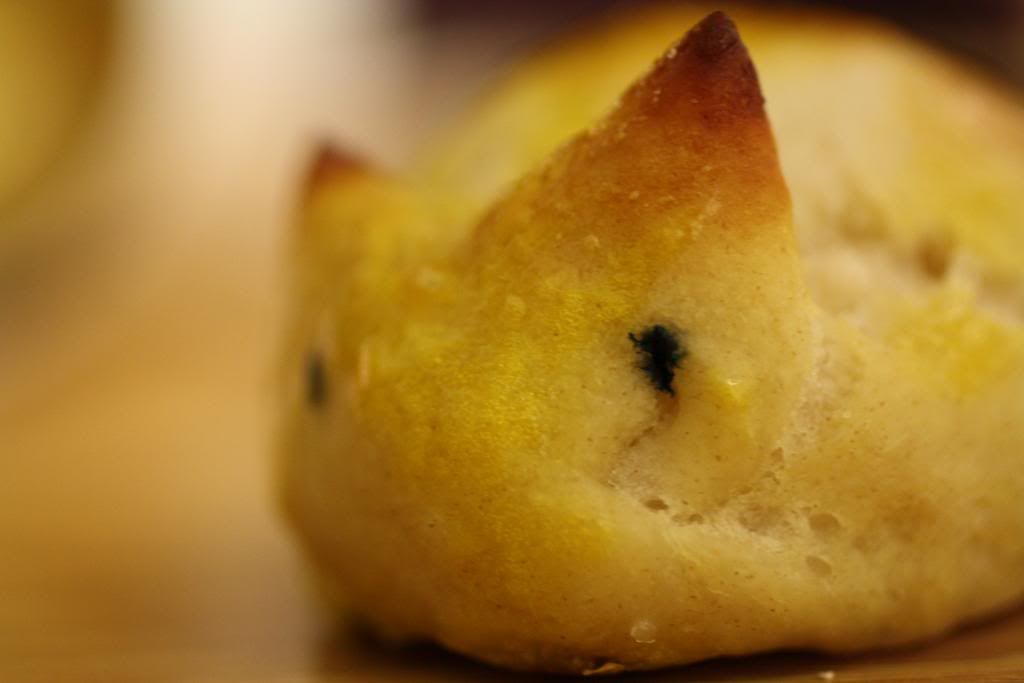
I don't bake bread at work (maybe in the future?), but I make a lot of it at home. We go through it pretty quickly, which I love, because it means I can make lots of different kinds. Hawaiian bread is easy, lightly sweet, and makes killer hamburger/sandwich buns. Or, if you're like me, toast it and break out your secret Biscoff stash. It's worth it. 


Hawaiian Bread
(This amount made a smallish loaf and 6 rolls) 

4 1/3 cups all-purpose flour
2 eggs
1 1/3 cups pineapple juice
1/2 cup sugar
1/3 teaspoon ginger
2/3 teaspoon vanilla
2 (1/4 ounce) envelopes yeast
1/3 cup butter, melted

Beat the eggs. Add the pineapple juice, sugar, ginger, vanilla, and butter.
Place flour. Stir in the egg mixture until well-combined. Sprinkle in the yeast, one packet at a time, and mix. Blending with a spoon will be hard, so you may have to use your hands. Make sure it is thoroughly combined. Alternatively...use a stand mixer. The dough will be soft and kind of sticky.
Cover the bowl with a cloth and set in a warm place to rise for 1 hour.
Place in greased and floured loaf pans or shape into rolls. Cover and place in a warm place to rise for 1 hour.
Bake at 350 degrees for 25-30 minutes or golden brown.

Friday, March 21, 2014

Crotins au Chocolate

Happy Spring! And happy spring break to me. The weather keeps being tricky...it will snow in the morning and all melt by the afternoon. Rain in the morning and sunshine at dinner. I don't mind–I'm ready for a change. 


I'm not going anywhere warm for break. I don't usually go for that sort of thing. Even when I was in Europe for break last year I hung out in Scotland and Hungary instead of Spain and Portugal. I'm going on a service trip again, my last one. We're heading to Washington, IL, where the terrible tornadoes hit in November. There's still so much work to be done, since the disaster struck just as winter was coming in. I can't wait to do some fulfilling work with my friends. Everyone wins ^__^


I have this weird pocket of free time before I leave, so naturally, I did some baking. These may look like a typical chocolate muffin, but they are actually leavened with yeast! I'm not sure what exactly to compare them to. A fluffy cake? But they get denser as they cool, and have slightly crunchy edges. Flourless chocolate cake? Not nearly that rich. Hm. I guess I'll have to be content with not being able to categorize them. 

Have a great week, everyone! I'll be back in a bit. 


Crotins au Chocolate 
from Joe Pastry

For the Sponge
3.6 ounces (3/4 cup) pastry or all-purpose flour
2 1/4 teaspoons (1 packet) instant yeast
1/2 teaspoon sugar
5 ounces (1/2 cup plus 2 tablespoons) lukewarm water

Alternately, for more flavor, you can use 9 ounces of active and bubbly sourdough starter.
For the Batter
7 ounces (1 cup) sugar
3.6 ounces (3/4 cup) pastry or all-purpose flour
1.8 ounces (1/2 cup plus 2 tablespoons) cocoa powder
1/4 teaspoon salt
8 ounces (2 sticks) butter
4 eggs, room temperature, lightly beaten
6 ounces (about 1 cup) coarsely chopped bittersweet chocolate

First make the sponge. Whisk the flour, yeast and sugar together in a medium bowl. Stir in the water, cover the bowl with plastic wrap and leave in a warm place to rise until bubbly. About half an hour. Meanwhile melt the butter in the microwave or in a small saucepan and let it cool.
Preheat your oven to 350 degrees Fahrenheit and place a rack in the middle of your oven. Lightly butter a muffin tin.
In a large bowl sift the sugar, flour and cocoa powder together. Make a well in the center and add the butter, eggs and yeast mixture. Whisk the wet ingredients together, gradually drawing in the dry ingredients until they’re all incorporated. Lastly stir in the chocolate.
Spoon or pipe the batter into the tin, filling the forms to the rim. Bake them for 15 to 18 minutes until almost firm to the touch. While they’re still warm sift on a dusting of cocoa powder.

Saturday, June 1, 2013

Melon Pan

It's not been as difficult getting back into the swing of things as I thought it would be. I'll fallen into a pretty comfortable daily routine without experiencing much culture shock. I suppose it would be different if I had gone to a country where English wasn't the primary language. But still, I find myself really grateful for little things I had taken for granted before, like skim milk, chocolate chips, garbage disposals...ovens. 


 I've been trying to make bread as often as possible. I love, LOVE working with yeast, and it just wasn't very practical to do in Ireland often. Since melon pan has been on my baking list for a while, I thought I'd try and tackle it. Melon pan is Japanese in origin. It contains no melon, but the cross-hatching pattern on the top somewhat resembles rock melon/canteloupe.


I enjoy melon pan not only for it's delicious flavor and texture (a crispy cookie shell surround a soft bun!), but also for its cross-cultural nature. Similar to aebleskivers, variations on melon pan are popular in countries all over the world, and goes by many different names. You may encounter it in China under the name of pineapple bun or polo bun, or in Latin America as conchas or pan dolce.  My cross-hatchy marks kind of disappeared during baking (aw man!), but the ending result was still tasty and texturally pleasing.


Melon Pan
from Joe Pastry

Cookie Topping: 
3 ounces (6 tablespoons) softened butter
3.25 ounces (scant half cup) sugar
7.5 ounces (1 1/2 cups) all-purpose flour
1/4 teaspoon baking powder
1/4 teaspoon salt
2 eggs
1/2 teaspoon vanilla extract
1 teaspoon lemon zest
Superfine sugar for dusting


In the bowl of a mixer fitted with the beater, beat the butter and sugar until light in color. Meanwhile, whisk the flour, baking powder and salt together in one bowl and the egg, egg white and extract (if you have it) in another. Add the egg mixture in two additions, beating well and scraping the bowl as needed. Once the egg is incorporated, slowly add in the flour and beat on low until it’s incorporated. Roll the dough into a log and place it in the refrigerator, covered, for at least half an hour. Meanwhile, prepare the buns. You’ll need:

10.5 ounces (scant 2 cups) bread flour
1/4 ounces (1 tablespoon) milk powder (dry milk)
1 1/2 teaspoons instant yeast
1.25 ounces (3 tablespoons) sugar
3/4 teaspoon salt
6 ounces (3/4 cup) lukewarm water
1 ounce (2 tablespoons) unsalted butter (bring to room temperature)


Place all the dry ingredients in the bowl of a mixer fitted with the paddle (beater). Stir to combine, then add the water. Continue to stir until all the ingredients are moistened, then switch to the dough hook and knead on medium until a ball forms, about three minutes. Add the softened butter and knead until it’s incorporated.
Transfer the dough to an oiled bowl and let rise about an hour until doubled (you’ll want to cover it with plastic wrap or towel to keep it from drying out). When the dough has risen, divide it into twelve equal portions and roll the pieces into balls. Cover them with a slightly moistened towel and let them sit about 10-15 minutes. 

Meanwhile, remove the cookie dough from refrigerator, and cut into 12 pieces (mine were each about 1.25 ounces). One at a time, roll them out between two layers of plastic wrap (thicker plastic is better. I cut a ziploc bag apart) to a diameter of about three inches. I took a saucepan and just pressed down on the ball with the bottom and it was about the right size. When you finish one, remove the top layer of plastic, place a ball of dough in the center and enclose it in the cookie dough (you’ll want to leave a small hole at the top, which will actually be the bottom, to allow for expansion). Invert the ball onto a parchment-lined baking sheet and carefully remove the plastic wrap.
With a sharp knife, score the cookie dough in a criss-cross pattern (or any pattern you like, really). Let the balls proof for another 45 minutes. Meanwhile, preheat your oven to 375. When the balls have swelled slightly, sprinkle superfine sugar all over them. Insert the pan into the oven and bake 15-20 minutes until golden brown.

Wednesday, February 27, 2013

Daring Bakers! - Rosemary Flatbreads

 Sarah from All Our Fingers in the Pie was our February 2013 Daring Bakers’ host and she challenges us to use our creativity in making our own Crisp Flatbreads and Crackers!

At the beginning of the month, I was fully confident that I wouldn't be able to complete this challenge. Of course I wanted to – I had never made crackers or flatbread before. But it just wasn't feasible to do it in a toaster oven, and I didn't know anyone with a full sized oven. So I resigned myself to defeat and tried to think of new ways to combine chocolate, peanut butter, and oats into no bake cookies. 


On my weekend in Northern Ireland, I found out that one of my friends had an oven, and that I could use it whenever I needed! I was really excited, but at the same time, didn't want to impose. Maybe it's silly, but I hate the thought of being a burden to someone. It's something I've always dealt with, though it's gotten better with time. I'm so glad I finally convinced myself that it was okay to go (my guilt assuaged by the fact that I was sharing my baked goods with her). 


 The flatbreads turned out great. Bread is one of my favorite things to make, and really, nothing can beat a warm piece fresh from the oven. The DB challenge basically gave us free reign to do what we wanted, but I was attracted to this simple flatbread, brushed with egg, salt, and rosemary. I have a feeling that with olive oil and oregano, this would make an awesome thin crust for a pizza. Maybe I'll have to try it out :) 

Bring it on, Daring Bakers! 

Look at that awesome bubble!!


Rosemary Flatbread

Ingredients:
1 cup (240 ml) warm water (about 110°F/43°C)
1 teaspoon (5 ml) (2 ¾ gm) active dry yeast
3 cups (720 ml) (420 gm) (15 oz) all-purpose (plain) flour, plus more for rolling
3 tablespoons (45 ml) of extra virgin olive oil
coarse salt
1 teaspoon (5 ml) (5 gm) sugar
1 large egg whisked with 1 tablespoon (15 ml) water, for egg wash
sea salt, for sprinkling
1/4 cup (60 ml) (7 gm) (¼ oz) fresh rosemary or thyme


Directions:
Place the water in a medium sized bowl and sprinkle the yeast. Let stand until the yeast is foamy, about 5 minutes. Stir in flour, oil, 2 teaspoons coarse salt, and the sugar. Stir until a dough forms.

Turn out dough onto a lightly floured surface and knead until smooth, about 2 minutes. Use as much flour as necessary so it is not a sticky dough. Place in a lightly oiled bowl and roll the dough around in the bowl so that it is also lightly oiled on the surface. Cover with saran wrap. Let stand in a warm place until it doubles in volume, about 1 hour.
Preheat oven to moderate 350°F/180°C/gas mark 4. Divide dough into 16 equal portions and cover with plastic wrap. Roll out each piece to approximately 4"x10" (10cm x 26cm) on a lightly floured surface. Transfer to parchment lined baking sheet. Brush with the egg mixture and sprinkle with sea salt and herbs.
Bake, rotating sheet halfway through baking, until crisp and golden, 18-22 minutes. Let cool on the baking sheet then transfer to a wire rack to cool completely.
Storage and Freezing Instructions/Tips: Store in an airtight container at room temperature for up to 1 month. Prolong the freshness by freezing for up to 3 months.


Thursday, December 27, 2012

Daring Bakers - Panettone!

The December 2012 Daring Bakers’ challenge was hosted by the talented Marcellina of Marcellina in Cucina. Marcellina challenged us to create our own custom Panettone, a traditional Italian holiday bread!

Oy, I almost forgot to post this, which would have been a shame, because a lot of work went into it! It hit me last night, but I was tooooo tired. All this lounging, you know, it's a lot of work.


I kind of internally cringed when I heard the challenge this month was Panettone (which I have an incredibly difficult time spelling, by the way). To me, it's basically a small step up from fruitcake in terms of deliciousness, fruitcake being at all bottom of the hierarchy of baked goods. I. Do. Not. Like. Dead. Fruit. Unless it's in the hands of Ned the Piemaker (swoon)


Chocolate and nuts is more my speed. So instead of candied citrus I used almonds, hazelnuts, and chocolate. Oh yeah. It's still not my favorite thing in the world, but I really enjoyed making this bread and have a greater appreciation for the work that goes into it. Know that this is not something you can whip up on a whim...it takes planning and many hours. PS: There's an optional almondy topping you can make, but I decided to go without, and use the extra egg whites to make these gluten free cookies for my sister. Everyone wins. 


Chocolate and Nut Panettone (makes two large)

Ingredients
Sponge
1 satchel (2¼ teaspoons) (7 gm) active dry yeast
1/3 cup (80 ml) warm water
½ cup (70 gm) unbleached all purpose flour

First Dough
1 satchel (2¼ teaspoons) (7 gm) active dry yeast
3 tablespoons (45 ml) warm water
2 large eggs, at room temp
1¼ cup (175 gm) unbleached all-purpose (plain) flour
¼ cup (55 gm) (2 oz) sugar
½ cup (1 stick) (115 gm) unsalted butter, at room temp

Second dough
2 large eggs
3 large egg yolks
2/3 cup (150 gm) (5-2/3 oz) sugar
3 tablespoons (45 ml) honey
1 tablespoon (15 ml) vanilla extract
1 teaspoon almond extract
1 teaspoon (5 ml) (6 gm) salt
1 cup (2 sticks) (225 gm) unsalted butter, at room temp
3 cups (420 gm) (15 oz) unbleached all-purpose (plain) flour; plus up to (2/3 cup) 100 gm for kneading

Filling and final dough
1½ cups (250 gm) (9 oz) almonds and hazelnuts, chopped and toasted
½ cup (75 gm) (2-2/3 oz) semisweet chocolate chips
2 to 3 tablespoons (30-45 ml) (15-25 gm) unbleached all-purpose (plain) flour


Sponge
  1. Mix the yeast and water in a small bowl and allow to stand until creamy. That’s about 10 minutes or so. Mix in the flour. Cover with plastic wrap and allow it to double in size, about 20-30 minutes.
First Dough
By hand:
  1. Mix the yeast and water in a large bowl and allow to stand until creamy. Again, about 10 minutes or so
  2. Mix in the sponge and beat well with a wooden spoon
  3. Stir in the eggs, flour and sugar.
  4. Mix in the butter well
  5. This should only take about 5 – 6 minutes
  6. Cover with plastic wrap and allow double in size, about 1 – 1 ¼ hours
By Mixer:
  1. In the mixer bowl, mix together the yeast and water and allow to stand until creamy. Again, about 10 minutes or so
  2. With the paddle attached mix in the sponge, eggs, flour, and sugar.
  3. Add in the butter and mix for 3 minutes until the dough is smooth and even. Cover with plastic wrap and allow double in size, about 1 – 1 ¼ hours
Second dough
By Hand:
  1. Be sure to have your dough in a large bowl as above.
  2. With a wooden spoon mix in eggs, egg yolk, sugar, honey, vanilla, essences/extracts and salt.
  3. Mix in the butter.
  4. Then add the flour. Stir until smooth.
  5. At this stage the dough will seem a little too soft, like cookie dough.
  6. Turn it out and knead it on a well-floured surface until it sort of holds its shape. Don’t knead in too much flour but you may need as much as 2/3 cup (100 gm). Be careful the excess flour will affect the finished product.
By Mixer:
  1. With the paddle mix in thoroughly the eggs, egg yolks, sugar, honey, vanilla, essences/extracts, and salt.
  2. Mix in the butter until smooth.
  3. Add the flour and slowly incorporate.
  4. At this stage the dough will seem a little too soft, like cookie dough.
  5. Replace the paddle with the dough hook and knead for about 2 minutes. Turn out the dough and knead it on a well-floured surface until it sort of holds its shape.
  6. Don’t knead in too much flour but you may need as much as 2/3 cup (100 gm). Be careful the excess flour will affect the finished product.
First Rise
  1. Oil a large bowl lightly, plop in your dough and cover with plastic wrap
  2. Now we need to let it rise until it has tripled in size. There are two ways to go about this.
  • Rise in a warm place for 2 – 4 hours
  • Or find a cool spot (64°F -68°F) (18°C – 20°C) and rise overnight
  • Or rise for 2 hours on your kitchen bench then slow the rise down and place in the refrigerator overnight. 
Filling and Final Rise:
  1. Combine all filling ingredients and mix well
  2. Divide dough in half and press out one portion into an oval shape
  3. Sprinkle 1/4 of the filling over the dough and roll up into a log
  4. Press out again into an oval shape and sprinkle over another quarter of the filling
  5. Roll into a log shape again.
  6. Repeat with the second portion of dough
  7. Shape each into a ball and slip into your prepared pans, panettone papers or homemade panettone papers.
  8. Cut an X into the top of each panettone and allow to double in size.
  9. Rising time will vary according to method of first rise. If it has been in the refrigerator it could take 4 hours or more. If it has been rising on the kitchen bench in a warm place it should be doubled in about 2 hours.
Baking
  1. When you think your dough has only about 30 minutes left to rise preheat your oven to moderately hot 400°F/200°C/gas mark 6 and adjust your oven racks
  2. Just before baking carefully (don’t deflate it!) cut the X into the dough again and place in a knob of butter.
  3. Place your panettone in the oven and bake for 10 minutes
  4. Reduce the heat to moderate 350°F/180°C/gas mark 4 and bake for another 10 minutes
  5. Reduce the heat again to moderate 325°F/160°C/gas mark 3 and bake for 30 minutes until the tops are well browned and a skewer inserted into the panettone comes out clean.
  6. Cooling your panettone is also important. If you have use papers (commercial or homemade) lie your panettone on their side cushioned with rolled up towels. Turn gently as they cool. If you have used pans cool in the pans for 30 minutes then remove and cushion with towels.
  7. Panettone can also be cooled suspended. How to do this? Firstly you need to use papers (commercial or homemade), insert clean knitting needles into the bottom of the panettone in a X shape. Flip over and support the knitting needles on the edges of a large saucepan with the panettone suspended within the saucepan. Yep, a lot of trouble and I didn’t really find that much difference – maybe I took too long to insert the needles.
OPTIONAL!
Almond Glaze for Panettone
Ingredients
1 cup (140 gm) (5 oz) whole blanched almonds
1 cup (125 gm) (4 ½ oz) confectioners' (icing) sugar
2 tablespoons (18 gm) (2/3 oz) whole wheat flour
3 large egg whites
3 tablespoons (45 ml) good quality extra virgin olive oil
Few drops of almond essence, to your taste
Pearl sugar, flaked almonds or course sugar to decorate

During the final rise, prepare the almond glaze. Process almond, confectioners’ sugar and flour until the nuts are finely chopped and well blended. Mix in the egg whites, oil and essence. Process to combine. It is meant to be thick and glue like. All is well! When the panettone are well risen carefully spread half the mixture over the top. Don’t worry about spreading it to the edges, in fact keep well away from the edges because the glaze will melt and spread. Bake as per the panettone recipe above.


Monday, December 17, 2012

Pretzel Bunnies

I'm moving out. 

It makes me a little panicky to see empty space in the corner where my futon was, to see my life neatly (well, maybe not so neatly) packed up into boxes. New chapter's beginning soon. Just have to get through this darn accounting final first. If you need someone to do a balance sheet or income statement for you...I'm your gal. Y'know, if you're not into letting professionals handle that sort of thing for you. 


Some of my friends who had been away all semester stopped by on Saturday, and it just felt so right to have them back. Telling amazing stories about their experiences, discussing everything from Nicaraguan government to Cabin in the Woods.
I missed these late nights. But as soon as everyone returns, I'll be gone. But I can't miss my own adventures because I'm too busy thinking about the ones happening at home. 


If I was a better storyteller, I'd be able to find a way to connect these pretzel bunnies with the above ideas. But...not quite there yet. But these cute lil' buns are a great way to use up that last egg, that bit of flour, you get the idea. 

I'll be back home, baking up a storm for the next couple weeks. But after that, changes are coming. I'm getting closer to coming to terms with the fact that this is real. 


Pretzel Bunnies
by Kirbie's Cravings

3/4 cups warm (110 to 115 degrees F) water
1/2 tablespoon sugar
1 teaspoons salt
1 1/8 tsp active dry yeast
2 1/4 cups all purpose flour
1 ounce unsalted butter, melted
1/3 cup baking soda
1 egg yolk


1. Combine the warm water, sugar and salt in the bowl of a stand mixer and sprinkle the yeast on top. Allow it to sit for about 5 minutes. Add the flour and butter and using the dough hook attachment, mix on low speed until well combined. Change to medium speed and knead about 5 minutes until the dough is smooth and pulls away from the side of the bowl. Remove the dough from the bowl, and place the dough in a glass bowl oiled with vegetable oil. Cover with plastic wrap and let rise in a warm place for approximately 50 to 55 minutes or until the dough has doubled in size.
2. Take a chunk of dough about the size of a ping pong ball and roll into an oval shape. Repeat with remaining dough.
3. Preheat the oven to 450 degrees F. Using a large sauce pan, fill with water. Bring the water to a boil and add the baking soda.
4. Place the pretzels into the boiling water for 30 seconds, a few at a time. Make sure to gently place in and don't let the dough roll around too much in order to preserve the oval shape and so the dough doesn't get too wrinkled or bubbled. Remove them from the water using a large flat spatula. Place pretzels on baking sheet lined with parchment paper or silpat mat.
5. Using kitchen shears, cut two ears. Beat one egg yolk. Brush the top of each pretzel bunny with the beaten egg yolk. Bake until dark golden brown in color, approximately 8 minutes. Add eyes with edible marker or food coloring after pretzels have cooled.

Sunday, November 4, 2012

Chocolate Pumpkin Breads

Well hey there. October passed in a flash, which is somewhat frightening, due to the fact that I am now merely weeks away from my 21st birthday (the age at which my mother will consider me a "real" adult, haha). Also, before I know it, I'll be in Ireland for four months. Of course that's exciting, but there are still so many unknowns right now, and it'll be sad to leave everything familiar. You knew I was going to Ireland, right? I feel like I've mentioned it offhandedly. Here's a picture which totally doesn't capture its behemoth-like proportions. 


Still, this is a booming metropolis compared to my school. 


So anyway, I'm embracing the pumpkin while I still have time. Although I have a sad pumpkin I planned to carve for Halloween sitting in the corner of my room. I hate that I didn't have time to carve it when I promised myself that I would. It's bothering me more than it probably should be. Well...Thanksgiving pumpkin?


These, despite having pumpkin in them, hardly tasted like pumpkin at all to me. Maybe it was more for...moisture? They're pretty homely. The supposed to be appetizing sugar crust looks sort of like...mold. I swear it's not. And someone stole the muffin pan so I had to make them more cinnamon rollish than was intended. And the chocolate chips look A LOT like raisins. Suspiciously so. I assure you they're not. Raisins will never make an appearance on this blog. I promise. Now that I've done such a great job selling these to you...haha, I dunno. Go enjoy your extra hour. 


Chocolate Pumpkin Breads 

by Hungry Girl por Vida 

1/3 cup warm milk
1/3 cup plain pumpkin puree
1/4 cup brown sugar
1 1/2 teaspoons yeast
1 egg, lightly beaten
2 1/4 cups flour
1/2 teaspoon salt
1/2 teaspoon cinnamon
4 Tablespoons unsalted, softened butter
Filling:
3 Tablespoons unsalted butter
1/4 cup brown sugar
8 ounces (1 cup) chocolate chips, or chopped bar
pinch of salt
1/2 teaspoon cinnamon
Egg Wash:
1 egg
1 Tablespoon cream
sugar for sprinkling

In measuring cup, combine milk with yeast and a pinch of sugar. Allow to proof 5 minutes. Stir in the pumpkin and the egg. In a large bowl, combine flour, remaining sugar, salt, and cinnamon. Add the yeast-pumpkin mixture and mix on low to combine (if you have a stand mixer. Otherwise, spoon/hands are cool). Add the butter 2 Tablespoons at a time, mixing until the butter is incorporated before adding the rest. Scrape dough from the paddle, add the dough hook attachment  and knead on medium speed for 10 minutes. The dough will be quite sticky and stringy. Place in an oiled bowl, cover with plastic and allow to rise until doubled in size, about 1 hour.

While the dough rises, make the filling. In the bowl of a food processor, process all ingredients until all of the butter is distributed and you have an uneven, gravely mixture. Or just chop at it violently with butter knives, which is what I did. Set aside.
Liberally butter a 12-cup muffin tin. Or not. A square or rectangle or round pan is cool too. Set aside.
Once dough has risen, turn the dough out onto a well floured surface and gently deflate. Allow to rest 5 more minutes, before rolling the dough out into a large rectangle, the short end measuring about 12 inches–the long edge can be about 18-22 inches. Sprinkle the chocolate filling evenly over the rectangle, it will be bumpy, and begin rolling from the short end all the way up into a 12-13 inch log and pinch to seal. Gently saw off about 1-inch spirals, placing each into a prepared tin. Cover loosely with plastic wrap and allow to rise another hour.

Meanwhile, preheat the oven to 350*F.
Whisk together the egg and cream, brush gently over the tops of the proofed buns and sprinkle liberally with sugar. Bake in the center of the oven for 15-25 minutes. Mine took closer to 25 minutes to bake. Remove from oven and cool on a rack for at least 15 minutes before serving.

Monday, June 4, 2012

My Other Blog : Rhubarb Sweet Rolls

Hi everyone! As you may or may not know, I'm working as an editorial intern at a local magazine this summer. Part of my duties involve keeping my own blog/column. My theme, of course, revolves around food, and I've chosen to visit local farmer's markets and talk about fresh produce. I think of it as the slightly more refined older sister of this blog. Perhaps it will rub off here! 

Anyway, I tried rhubarb FOR THE FIRST TIME (I know, and I call myself a lover of food...) and wrote about it. Clicky clicky here for the post


Friday, May 11, 2012

Brioche Cinnamon Rolls

It's getting to that point in the year where I just don't want to do anything anymore. I don't want to study. I don't want to eat cafeteria food. I don't want to share a kitchen with strangers. There are ten days left in my sophomore year of college. It's insane. When I was younger I was terrified of being at this stage of my life. How am I going to learn how to drive a car? Pay bills? Write research papers? 


It hasn't been as scary as I thought. It's kind of mundane, actually. It's not as if I was in 4th grade one day and 20 years old the next, having to deal with the world. You ease into it. Time's nice that way (maybe to make up for all the instances when time isn't so nice). On a side note, when I was young, I thought 20ish was a perfectly reasonable time to get married. People have their lives figured out by then, right? Hahahahaha. Oh, me. 


Right now, all I want to focus on is sinking my hands into some buttery, silky dough and forgetting all of my troubles. It works pretty well. Believe you me, brioche dough makes some killer cinnamon rolls (Literally! Not literally. I don't want to kill you.)'


Brioche Cinnamon Rolls 
(This dough makes enough for a double batch of cinnamon rolls. I divided it in half and made some plain brioches as well)
adapted from Dessarts

dough:
50 mL water, 100-115F-ish
5 eggs
4 1/2 tsp active dry yeast
3 3/4 cup flour (you may need a bit more)
1/3 cup sugar
1 cup plus 2 Tbs cold butter
Temper your butter by wrapping it in plastic and patting it down with a rolling pin. You want it soft and cold but not melted. Store it in the refrigerator while you prepare the rest. Mix warm water, sugar, and yeast, let sit until super foamy. Combine yeast mix, flour and eggs in a bowl, knead until smooth, using a stand mixer or your hands.
Gradually add in the cold tempered butter. Work the dough until it is smooth and satiny. Be sure to scrape the dough off the sides and paddle during mixing (If you're using a stand mixer. Otherwise, just knead the heck out of it). Place the dough in a large oiled bowl and let it rise for 1 hour. Punch it down into a ball, wrap in plastic tightly and let it rest in the refrigerator for at least four hours. You may want to double wrap it and put it in a bowl in case it expands out of the plastic.

Cinnamon Rolls (makes about 15 rolls)
Half batch of brioche dough (recipe below)
2 Tbs cinnamon
1/2 cup light brown sugar
2 Tbs butter, softened
1/4 cup cream cheese
3 Tbs milk
1 1/2 cup confectioners sugar
Combine the brown sugar and cinnamon in a small bowl. Roll out the brioche dough on a floured surface (preferably a cool surface) into a 15 by 11 inch rectangle to 1/4 inch thickness. Spread the butter over the dough leaving a 1/2 inch border. Spread the cinnamon sugar evenly over the butter. Roll the dough lengthwise. With the seam side down, cut the dough at 1 inch intervals. (I used dental floss to get nice clean cuts)
Place the rolls on a baking sheet. Try to tuck the roll tails under each roll. Cover them with plastic and a kitchen towel. Let them rise until doubled. Bake at 350°F until golden brown, about 20 minutes. Remove from baking sheet to cool.
Combine the cream cheese, milk and sugar in an electric mixer and whisk until smooth. Drizzle or pipe over the rolls.

Thursday, February 9, 2012

Banana Sandwich Bread

Back at school, back in normal life with four classes, and four classes worth of homework. Such is life. Couple that with applying for summer internships and study abroad, socializing, alone time...you get the idea. Now that I don't have it anymore, I miss the relaxed atmosphere of interim. No cafeteria lines, little to no homework...you always want what you don't have, right? 


Anyway, I made banana bread. Probably not the kind you're thinking of. I've tried many times to make that delicious quick bread on here, but my pictures always turn out ugly or I get distracted or I just want to eat my dang bread and not worry about blogging. Haha. I assure you, I make an awesome banana bread. Come visit and I'll make it for you sometime.


Truth: every time I've tried to make sandwich bread it turns out flavorless and most likely raw in the middle. It seems I have lifted that curse. Is the secret that this bread contains a banana? Maybe it's the fresh cake yeast (which, by the way, had a totally different texture than I was expecting!). Or, most likely, I've just gotten better. Practice makes perfect. Make this and you'll end up with something almost like a Hawaiian bread. I think it makes lovely sandwiches, but then again, I enjoy adding a little sweet to my savory.

Or just more sweet to my sweet, haha. 


Banana Sandwich Bread

  • 1 cup lukewarm milk
  • 3 cups Unbleached Bread Flour
  • 2 tablespoon butter, room temperature
  • 2 1/4 teaspoons instant yeast (or 21 g crumbled fresh yeast)
  • 1 teaspoon salt
  • 2 tablespoons honey
  • 1 medium-sized bananas, cut into chunks, about 3/4 cup
In a large mixing bowl, or in the bowl of an electric mixer, combine all of the ingredients, mixing to form a shaggy dough. Knead the dough, by hand (10 minutes) or by mixer (5 minutes) until it's smooth. Place the dough in a lightly greased bowl, and allow it to rest for 1 hour.
Transfer the dough to a lightly oiled work surface, and shape it into a log. Place the dough in a lightly greased 8 1/2" x 4 1/2" loaf pan, cover the pan with lightly greased plastic wrap, and allow the dough to rise for 45 minutes to 1 hour, until it is full and rounded.
 Bake the bread in a preheated 350°F oven for 35 to 40 minutes, until an instant-read thermometer inserted into the center registers 190°F. If the bread appears to be browning too quickly, tent it with aluminum foil for the final 10 minutes of baking.


Thursday, January 26, 2012

I love bagels.

I am so sleepy, but it's kind of not okay to crash at 8:30. But my January class is pretty much over, so I'll get to have a little vacation. Wanna know my favorite movies from the class? Of course you do! 

-Rashomon (pretty much the base for any movie with multiple perspectives)
-Mr. House Wife (cute, Korean, better than American rom-coms.)
-Millennium Actress (Very cool anime about the life of an actress. Where do her roles and her real life intersect?)
-Paprika (same director as above, insane electro-pop and vibrant animation, highly recommended. The original Inception.)
-3 Iron (So. Adorable. It's amazing how much can be said with no words at all).

Had to break out the big jar of yeast.
Anyway, BAGELS. I'm really on a roll (harharhar) with the yeast breads right now. It's just so relaxing! And I'd never made bagels before. Pretzels, yes, bagels no. I'm spoiled because I'm originally from New York, and nothing can beat a New York bagel. They're magical, I swear. But I thought I could at least do better than the sub-par bagels at school. 

When you pushed down on the doughs, they made funny "psssshhh" sounds

So...did I? I believe so. Definitely beats Sara Lee. I wish I had some fancy things to put on top, but I'm kind of lacking in the fancy things department over here. So plain had to do. It's amazing how many different breads can be made out of the same kind of dough. These are definitely bagels, but have the same ingredients as sandwich bread. If you shaped your dough into a loaf of bread, boiled it, then baked it, would it turn into a giant bagel? The world may never know...


Bagels


1 teaspoon active dry yeast
1 1/4 cups warm milk (110 to 115 degrees F)
1/4 cup butter or margarine, softened
2 tablespoons sugar
1 teaspoon salt
1 egg, separated
3 3/4 cups all-purpose flour

In a mixing bowl, dissolve yeast in warm milk. Add the butter, sugar, salt and egg yolk; mix well. Stir in enough flour to form a soft dough. Turn onto a floured surface; knead until smooth and elastic, about 6-8 minutes. Place in a greased bowl, turning once to grease top. Cover and let rise in a warm place until doubled, about 1 hour. Punch dough down. Shape into 8 balls. Push thumb through centers to form a 1-in. hole. Place on a floured surface. Cover and let rest for 10 minutes; flatten. In a large saucepan, bring water to a boil. Drop bagels, one at a time, into boiling water. When bagels float to the surface, remove with a slotted spoon and place 2 in. apart on greased baking sheets (Important! I might even use parchment paper). Brush each bagel with the reserved egg white. Don't use an excessive amount unless you feel like having a fried egg white (which I didn't, unfortunately). Bake at 400 degrees F for 20-25 minutes or until golden brown. Remove from pans to wire racks to cool. 

Friday, January 6, 2012

Kakaós Csigák (Chocolate Snails)


Someone I care about very much is currently 5000 miles away in Budapest. The city looks beautiful and the opportunity is great, but it doesn't stop me from wishing we could see each other. So how do I bring my own little bit of Hungary to the United States? Through baking, of course.

I can't get over how weird egg yolks are. 


I really don't know a whole lot about Hungarian food. Words that come to mind are paprika and goulash (so much fun to say, try it) but my knowledge in the baked goods department is lacking. Except for dobos torte, sigh. I'm severely lacking in the space and resources for that. I'll save it for another time.

See? This is what I'm working with. I used that bottle of soy sauce as a rolling pin, haha. 


I finally found something called Kakaós Csigák, which I have nooooo idea how to pronounce, but I've seen it translated as chocolate snails, so that's what it will be. In my book, this is the first successful yeast bread I've made at school, without the help of my stand mixer. I don't really count the ugly bread, even though it was tasty. This gives me confidence! Confidence is key! Mmm. To my Hungarian friends out there...miss you. Come back soon!


Kakaós Csigák aka Chocolate Snails
adapted from Chocolate River 

2 1/4 tsp instant yeast
500g flour (about 4 1/2 cups)
50g soft butter (about 3.5 Tbsp)
300 ml lukewarm milk (about 10.25 ounces)
1 egg yolk
4 tsp sugar plus a pinch
4 tsp cocoa powder
8 tsp powdered sugar
to douse:
150 ml milk
50g butter

Pour flour, salt and sugar in a large bowl, make a well in the middle and cut butter around it. Sprinkle into the well, add a pinch of sugar and enough milk to cover the yeast. Stir a few times, then cover it with a dish towel and let the sponge rise for about 15 minutes. Add remaining milk and the egg yolk, then knead the dough for a few minutes until it comes together (if it is a bit sticky, you may want to use a bit less milk first, then add by the tablespoon).  Cover the dough again and let it rise until the volume is doubled – this took about an hour. in the meantime mix icing sugar and cocoa for the filling. Preheat the oven to 350F. When doubled, knead the dough a few times then roll out into a large rectangle. Cover evenly with filling and roll it up, starting with a long edge. I kept dabbing the edge with water to keep it together. Cut into slices and transfer onto a parchment lined baking sheet. Bake for 15 minutes.  Meanwhile, heat the extra 150ml milk and melt the butter in it. pour the mixture over the rolls and bake for another 15 minutes. until puffy and slightly golden.


Sunday, September 18, 2011

Ugly Bread

I read a fair amount of other blogs belonging to college age bakers, and I've noticed a lull in posting. That's true for me too. It's not that I don't want to post, just that I haven't had much time. The past week was ridiculously hectic. I'm hoping things quiet down a bit soon. 
Watching yeast bloom is beautiful and magical. Don't judge me. 


The other day, I got that bread craving. I dunno if you understand what I mean, but sometimes I just want that feel of dough in my hands and a chunk of hot bread in my mouth. And once again, I've taken something for granted: The stand mixer. But they made bread back in the good ol' days before all this fancy technology, and I wanted bread. Pronto. So by golly, I was going to get it! 

Ugly. 


I decided to try one of those no knead recipes (but not the no knead recipe, I didn't have the patience or the proper cooking vessel). Man, that dough was sticky. Is all no knead dough this sticky? The result was the ugliest, most misshapen loaf (more like a boule, technically) of bread I have ever produced. And it tasted fantastic. It was devoured immediately, shared among friends while still piping hot. Someone even said it was better than ice cream. I consider that a compliment of the highest order. 

No picture of the end result (totally forgot, too busy eating and playing this awesome game) so here's a picture of my beautiful dough hands.


Ugly Bread

makes 2 round loaves (or one huge, hideous loaf)

1 tablespoon quick rising yeast
2 cups warm water
1 tablespoon sugar
1 teaspoon salt
4-5 cups all-purpose flour (you may need more or less than this)
corn meal
2 Tbsp  butter, melted

Combine the yeast, water and sugar in a large bowl.  Allow the yeast to bloom for a few minutes.  Add the flour and salt and stir just until combined.  Do not knead.  Cover and let rise until doubled in size, about an hour.  Dust a cookie sheet with corn meal.  Remove from the bowl, and with floured hands, shape into 2 round loaves.  Place loaves on the prepared cookie sheet.  Let rise for an additional hour.
Preheat oven to 425F.  Brush melted butter on top of the loaves.  Bake in the preheated oven for 10 minutes, then reduce heat to 375F and cook an additional 15 minutes.