Showing posts with label almond. Show all posts

Sunday, April 3, 2016

White Chocolate Raspberry Almond Bars

This is not a belated April Fool's joke. I'm starting Whole30 on Tuesday, and I'm nervous as all get out. If you haven't heard of Whole30, it's...sort of like paleo? But without the cheat-y substitutes for "real" foods that I see people making. It's basically stripping away grains, legumes, sugar, dairy, alcohol, and additives like MSG or carrageenan.


I'm inherently suspicious of these kinds of fad diets. But this is just...eating real food. Lots of eggs, meat, veggies, fruit, and healthy fats from nuts, avocados, olive oil, stuff like that. And I've grown to realize that I have an addiction to sugar. I don't really enjoy foods as much if they don't contain dairy or carbs. I feel like that's a problem. So with this upcoming 30 days, I would like to physically and psychologically cleanse myself. It's going to be difficult (even if the Whole30 people tell you to suck it up) so we'll see how this shakes out.

The reason I'm starting on Tuesday and not tomorrow (Monday) is because there is a bar baking contest at work on Monday, and I want to taste my competition. My entry is these white chocolate, raspberry, and almond bars. They're from a book my grandparents gave me when I was a kid, and they are delightful. The natural tang of the raspberries balances out the sweet creaminess of the white chocolate. Wish me luck!


White Chocolate Raspberry Almond Bars

1/2 c butter
2 oz. chopped white chocolate
2 eggs
2/3 c sugar
1 tsp vanilla
1 c flour
1/2 c chopped almonds
1/2 tsp baking powder
pinch of salt
1 c raspberries

Preheat the oven to 350. Grease and line a 8x8 pan with foil. In a medium saucepan, heat butter and and white chocolate, stirring constantly. Remove from heat and stir in eggs, vanilla, and sugar. Add flour, baking soda, salt, and almonds. Spread in the prepared pan and sprinkle with raspberries. Bake for 30-35 minutes until golden brown. 

Wednesday, March 16, 2016

Pink Squirrel Cupcakes

I don't make a lot of cupcakes anymore. I'm more more of a cake lady these days. Maybe because it seems fussy to have to portion all those little cups out, I dunno. Maybe because I've been too busy this past year making Milk Bar layer cakes, which do not translate at all to cupcake form. 


I saw a recipe for Pink Squirrel cupcakes on Sprinkle Bakes back in December, and have been dreaming about them ever since. I've been fascinated by the Pink Squirrel cocktail, but it's kind of out of fashion these days, and I fear that if I ever tried to order one, bartenders would laugh/stare at me. A Pink Squirrel is Creme de Cacao, Creme de Noyaux (or Creme de Almond) and heavy cream. It is bright pink and looks kind of like Pepto Bismol. 


I got my Creme de Noyaux from a creepy liquor store attached to a gas station, but my Creme de Cacao is some Tattersall, a local distillery. I'd love to go on one of their tours because...well, I'm a food/beverage nerd I guess. I like to know how stuff works, okay? Anyway, they make awesome spirits. Naturally, my cupcakes were not as beautiful as Heather's. But they have a light texture and mild almond flavor. Very nice in my book. The "American" style buttercream is a bit sweet for my tastes, but hey, it's a Pink Squirrel, and you're supposed to go over the top. 


Pink Squirrel Cupcakes 

Cakes
1/2 cup butter softened
1 cup granulated sugar
2 eggs
1 tsp vanilla
1 3/4 cups flour
1/2 tsp baking soda
1/4 tsp baking powder
1/4 tsp salt
1/2 cup sour cream
1/4 cup crème de noyaux liqueur (also called crème de almond)
1/4 cup clear or white crème de cocoa liqueur
1/4 teaspoon almond extract
Pink gel food color, optional

Crème de noyaux frosting
2 sticks of butter softened
4 cups confectioners' sugar
1/4 cup crème de noyaux liqueur
Pink gel food color
White nonpareils for sprinkling

Preheat oven to 350 degrees.

Make the cakes: In the bowl of a stand mixer fitted with the paddle attachment, cream together butter and sugar until light and fluffy. Add eggs one at a time beating well after each addition. Add vanilla and mix. Whisk together flour, baking soda, baking powder and salt, set aside. In a medium bowl, whisk together the sour cream, crème noyaux, crème do cocoa and almond extract. Add flour and sour cream mixture alternately, beginning and ending with flour. Beat in a drop of pink food color, if using. Batter will be thick.
Fill cupcake papers with 1/4 cup level measures of batter. Bake for 17-22 minutes. Set aside.

Make the frosting: In the bowl of a stand mixer fitted with the whisk attachment, cream softened butter and powdered sugar together. Once the frosting is thick, add the crème de noyaux one tablespoon at a time while beating on medium-low speed until the mixture is light and fluffy. Add a drop of pink gel food color; mix well.
Transfer the frosting to a piping bag fitted with a large star tip. Pipe the frosting onto the cooled cupcakes. Sprinkle with nonpareils. Garnish the cupcakes with a glittering squirrel topper (recipe follows). You may also choose to top the cupcakes with maraschino cherries with stems, as this is the usual Pink Squirrel Cocktail garnish.

Wednesday, June 12, 2013

Financiers

There re two kinds of bakers in this world: egg white bakers and egg yolk bakers. I am firmly planted in the yolk camp. Most of the time, I am of the opinion that egg white based desserts are too fussy, and I'd much prefer to make pudding or pastry cream than angel food cake. The only good thing about angel food cake is that you can compress a slice into a tiny ball and shove the whole thing in your mouth. 


The point is, I am often left with an overabundance of albumen that I just don't know what to do with. Thankfully, egg whites last a long time and can be frozen if you don't want to use them right away. I usually end up forgetting about them if I do that though...oops...

My buddies at OXO sent me some awesome egg tools around Easter that I hadn't gotten to use until now, since I was out of the country. This egg separator rocks my world. Never again do I have to worry about getting yolks in the whites!

So I have recently taken on a baking project that required NINE egg yolks (Oy vey. Wait a couple weeks and you'll see what I am talking about. What can I do with so many egg whites? Make a healthy omelette, I guess, if you're into that sort of thing. Or combine them with sugar, browned butter and almonds to make financiers. That's more my style.  The name of these little cakes comes from the fact that the traditional molds are rectangular, making them look like gold bars. I used tiny tart pans to make mine extra cute, but honestly, they were kind of a pain to get out of the mold and I kind of wish I had used mini muffin tins instead. Live and learn!


Financiers
from Dorie Greenspan

1 1/2 sticks (6 ounces; 180 grams) unsalted butter
1 cup (200 grams) sugar
1 cup (100 grams) ground almonds
6 large egg whites
2/3 cup (90 grams) all-purpose flour

Put the butter in a small saucepan and bring it to the boil over medium heat, swirling the pan occasionally.  Allow the butter to bubble away until it turns a deep brown, but don't turn your back on the pan - the difference between brown and black is measured in seconds.  Pull the pan from the heat and keep it in a warm place.
Mix the sugar and almonds together in a medium saucepan.  Stir in the egg whites, place the pan over low heat, and, stirring constantly with a wooden spoon, heat the mixture until it is runny, slightly white and hot to the touch, about 2 minutes.  Remove the pan from the heat and stir in the flour, then gradually mix in the melted butter.  Transfer the batter to a bowl, cover with plastic wrap, pressing it against the surface of the batter to create an airtight seal, and chill for at least 1 hour.  (The batter can be kept covered in the refrigerator for up to 3 days.)

Center a rack in the oven and preheat the oven to 400 degrees F (200 degrees C).  Butter 12 rectangular financier molds (these were tested in 3-3/4 x 2 x 5/8-inch [10 x 5 x 1-1/2-cm] rectangular molds that each hold 3 tablespoons), dust the interiors with flour and tap out the excess.  Place the molds on a baking sheet for easy transport. Or use whatever pan you have handy. Just make sure to grease them a lot.
Fill each mold almost to the top with batter.  Slide the molds into the oven and bake for about 13 minutes, or until the financiers are golden, crowned and springy to the touch.  If necessary, run a blunt knife between the cookies and the sides of the pans, then turn the cookies out of their molds and allow them to cool to room temperature right side up on cooling racks.

Thursday, December 27, 2012

Daring Bakers - Panettone!

The December 2012 Daring Bakers’ challenge was hosted by the talented Marcellina of Marcellina in Cucina. Marcellina challenged us to create our own custom Panettone, a traditional Italian holiday bread!

Oy, I almost forgot to post this, which would have been a shame, because a lot of work went into it! It hit me last night, but I was tooooo tired. All this lounging, you know, it's a lot of work.


I kind of internally cringed when I heard the challenge this month was Panettone (which I have an incredibly difficult time spelling, by the way). To me, it's basically a small step up from fruitcake in terms of deliciousness, fruitcake being at all bottom of the hierarchy of baked goods. I. Do. Not. Like. Dead. Fruit. Unless it's in the hands of Ned the Piemaker (swoon)


Chocolate and nuts is more my speed. So instead of candied citrus I used almonds, hazelnuts, and chocolate. Oh yeah. It's still not my favorite thing in the world, but I really enjoyed making this bread and have a greater appreciation for the work that goes into it. Know that this is not something you can whip up on a whim...it takes planning and many hours. PS: There's an optional almondy topping you can make, but I decided to go without, and use the extra egg whites to make these gluten free cookies for my sister. Everyone wins. 


Chocolate and Nut Panettone (makes two large)

Ingredients
Sponge
1 satchel (2¼ teaspoons) (7 gm) active dry yeast
1/3 cup (80 ml) warm water
½ cup (70 gm) unbleached all purpose flour

First Dough
1 satchel (2¼ teaspoons) (7 gm) active dry yeast
3 tablespoons (45 ml) warm water
2 large eggs, at room temp
1¼ cup (175 gm) unbleached all-purpose (plain) flour
¼ cup (55 gm) (2 oz) sugar
½ cup (1 stick) (115 gm) unsalted butter, at room temp

Second dough
2 large eggs
3 large egg yolks
2/3 cup (150 gm) (5-2/3 oz) sugar
3 tablespoons (45 ml) honey
1 tablespoon (15 ml) vanilla extract
1 teaspoon almond extract
1 teaspoon (5 ml) (6 gm) salt
1 cup (2 sticks) (225 gm) unsalted butter, at room temp
3 cups (420 gm) (15 oz) unbleached all-purpose (plain) flour; plus up to (2/3 cup) 100 gm for kneading

Filling and final dough
1½ cups (250 gm) (9 oz) almonds and hazelnuts, chopped and toasted
½ cup (75 gm) (2-2/3 oz) semisweet chocolate chips
2 to 3 tablespoons (30-45 ml) (15-25 gm) unbleached all-purpose (plain) flour


Sponge
  1. Mix the yeast and water in a small bowl and allow to stand until creamy. That’s about 10 minutes or so. Mix in the flour. Cover with plastic wrap and allow it to double in size, about 20-30 minutes.
First Dough
By hand:
  1. Mix the yeast and water in a large bowl and allow to stand until creamy. Again, about 10 minutes or so
  2. Mix in the sponge and beat well with a wooden spoon
  3. Stir in the eggs, flour and sugar.
  4. Mix in the butter well
  5. This should only take about 5 – 6 minutes
  6. Cover with plastic wrap and allow double in size, about 1 – 1 ¼ hours
By Mixer:
  1. In the mixer bowl, mix together the yeast and water and allow to stand until creamy. Again, about 10 minutes or so
  2. With the paddle attached mix in the sponge, eggs, flour, and sugar.
  3. Add in the butter and mix for 3 minutes until the dough is smooth and even. Cover with plastic wrap and allow double in size, about 1 – 1 ¼ hours
Second dough
By Hand:
  1. Be sure to have your dough in a large bowl as above.
  2. With a wooden spoon mix in eggs, egg yolk, sugar, honey, vanilla, essences/extracts and salt.
  3. Mix in the butter.
  4. Then add the flour. Stir until smooth.
  5. At this stage the dough will seem a little too soft, like cookie dough.
  6. Turn it out and knead it on a well-floured surface until it sort of holds its shape. Don’t knead in too much flour but you may need as much as 2/3 cup (100 gm). Be careful the excess flour will affect the finished product.
By Mixer:
  1. With the paddle mix in thoroughly the eggs, egg yolks, sugar, honey, vanilla, essences/extracts, and salt.
  2. Mix in the butter until smooth.
  3. Add the flour and slowly incorporate.
  4. At this stage the dough will seem a little too soft, like cookie dough.
  5. Replace the paddle with the dough hook and knead for about 2 minutes. Turn out the dough and knead it on a well-floured surface until it sort of holds its shape.
  6. Don’t knead in too much flour but you may need as much as 2/3 cup (100 gm). Be careful the excess flour will affect the finished product.
First Rise
  1. Oil a large bowl lightly, plop in your dough and cover with plastic wrap
  2. Now we need to let it rise until it has tripled in size. There are two ways to go about this.
  • Rise in a warm place for 2 – 4 hours
  • Or find a cool spot (64°F -68°F) (18°C – 20°C) and rise overnight
  • Or rise for 2 hours on your kitchen bench then slow the rise down and place in the refrigerator overnight. 
Filling and Final Rise:
  1. Combine all filling ingredients and mix well
  2. Divide dough in half and press out one portion into an oval shape
  3. Sprinkle 1/4 of the filling over the dough and roll up into a log
  4. Press out again into an oval shape and sprinkle over another quarter of the filling
  5. Roll into a log shape again.
  6. Repeat with the second portion of dough
  7. Shape each into a ball and slip into your prepared pans, panettone papers or homemade panettone papers.
  8. Cut an X into the top of each panettone and allow to double in size.
  9. Rising time will vary according to method of first rise. If it has been in the refrigerator it could take 4 hours or more. If it has been rising on the kitchen bench in a warm place it should be doubled in about 2 hours.
Baking
  1. When you think your dough has only about 30 minutes left to rise preheat your oven to moderately hot 400°F/200°C/gas mark 6 and adjust your oven racks
  2. Just before baking carefully (don’t deflate it!) cut the X into the dough again and place in a knob of butter.
  3. Place your panettone in the oven and bake for 10 minutes
  4. Reduce the heat to moderate 350°F/180°C/gas mark 4 and bake for another 10 minutes
  5. Reduce the heat again to moderate 325°F/160°C/gas mark 3 and bake for 30 minutes until the tops are well browned and a skewer inserted into the panettone comes out clean.
  6. Cooling your panettone is also important. If you have use papers (commercial or homemade) lie your panettone on their side cushioned with rolled up towels. Turn gently as they cool. If you have used pans cool in the pans for 30 minutes then remove and cushion with towels.
  7. Panettone can also be cooled suspended. How to do this? Firstly you need to use papers (commercial or homemade), insert clean knitting needles into the bottom of the panettone in a X shape. Flip over and support the knitting needles on the edges of a large saucepan with the panettone suspended within the saucepan. Yep, a lot of trouble and I didn’t really find that much difference – maybe I took too long to insert the needles.
OPTIONAL!
Almond Glaze for Panettone
Ingredients
1 cup (140 gm) (5 oz) whole blanched almonds
1 cup (125 gm) (4 ½ oz) confectioners' (icing) sugar
2 tablespoons (18 gm) (2/3 oz) whole wheat flour
3 large egg whites
3 tablespoons (45 ml) good quality extra virgin olive oil
Few drops of almond essence, to your taste
Pearl sugar, flaked almonds or course sugar to decorate

During the final rise, prepare the almond glaze. Process almond, confectioners’ sugar and flour until the nuts are finely chopped and well blended. Mix in the egg whites, oil and essence. Process to combine. It is meant to be thick and glue like. All is well! When the panettone are well risen carefully spread half the mixture over the top. Don’t worry about spreading it to the edges, in fact keep well away from the edges because the glaze will melt and spread. Bake as per the panettone recipe above.


Tuesday, December 25, 2012

Zuccotto


Merry Christmas, friends! I hope your holidays have been filled with love and family and relaxation and delicious foods. I've basically been on a rotation of sleeping, reading, playing this game, and eating. We did our Italian, scaled down version of Feast of the Seven Fishes last night, and it was quite tasty. Lobster and clams are kind of a rarity in the midwest.


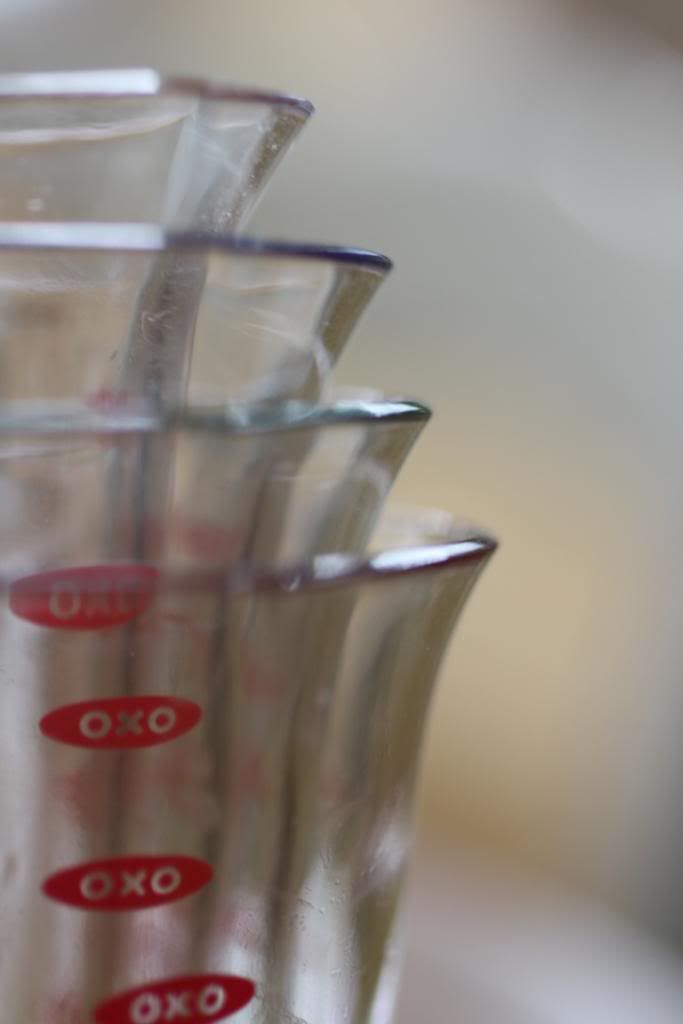
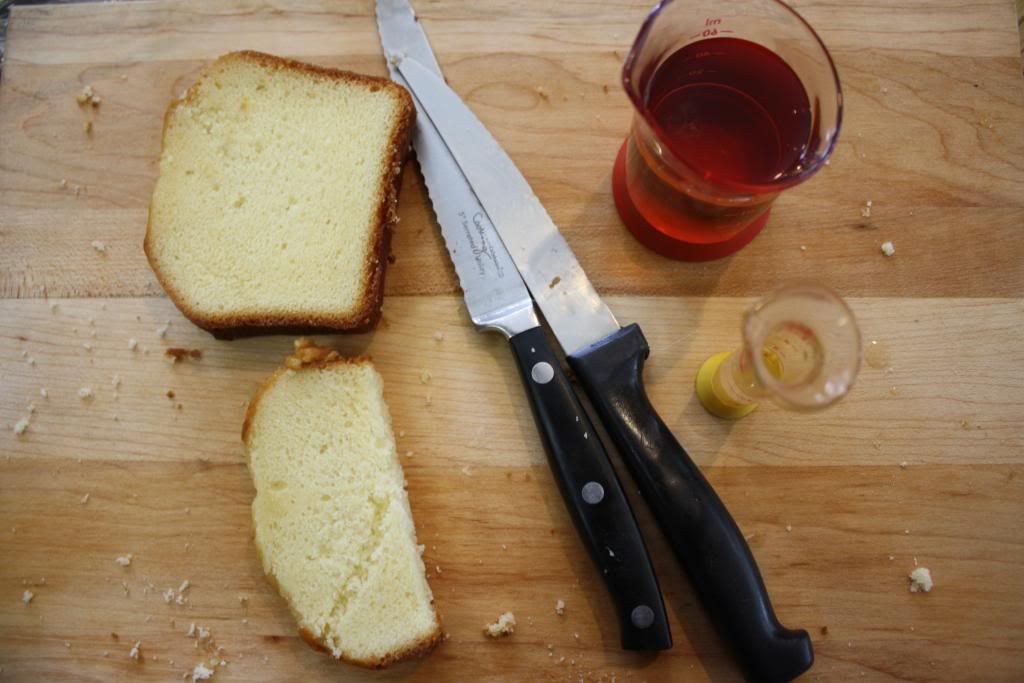
A while back OXO sent me some strange tiny measuring beakers for small amounts of liquids. I've been deliberating about how to use them for a while, and then remembered thatI've been wanting to make this super cute dessert called Zuccotto for a while. Zuccotto means little pumpkin in Italian, which is adorable, and it's traditionally a chilled, hemispherical dealie made with cake, ice cream, and brandy. The version I found used pound cake, chocolate, amaretto, and almond whipped cream, which is a is a little more my speed. The amaretto and almond extract were perfect in my measuring beakers, and made me feel like I was doing science things instead of just baking.


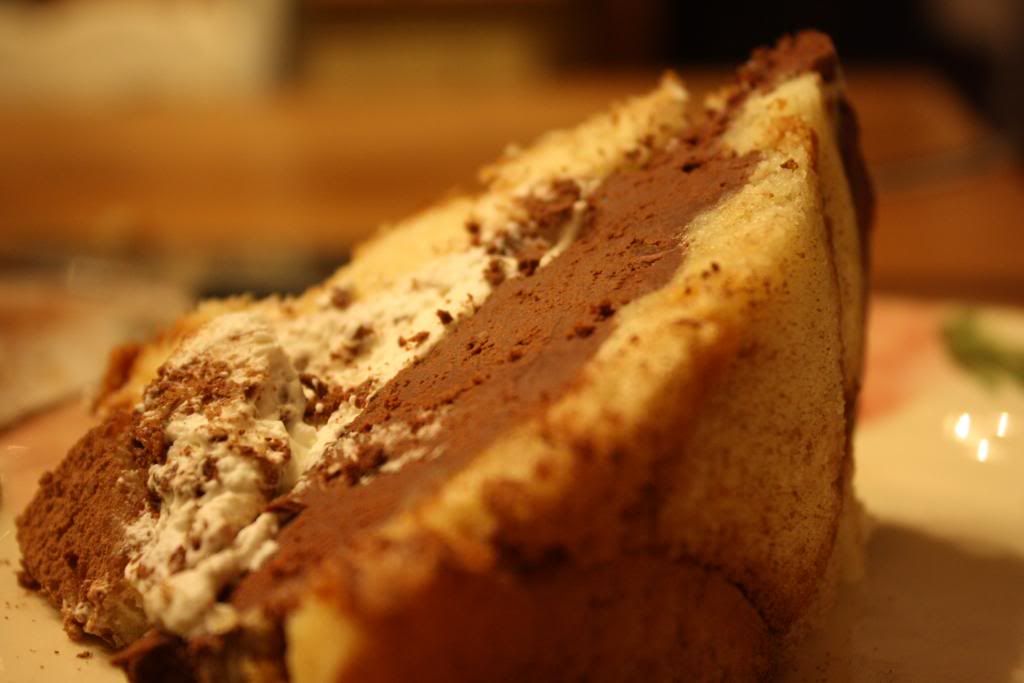
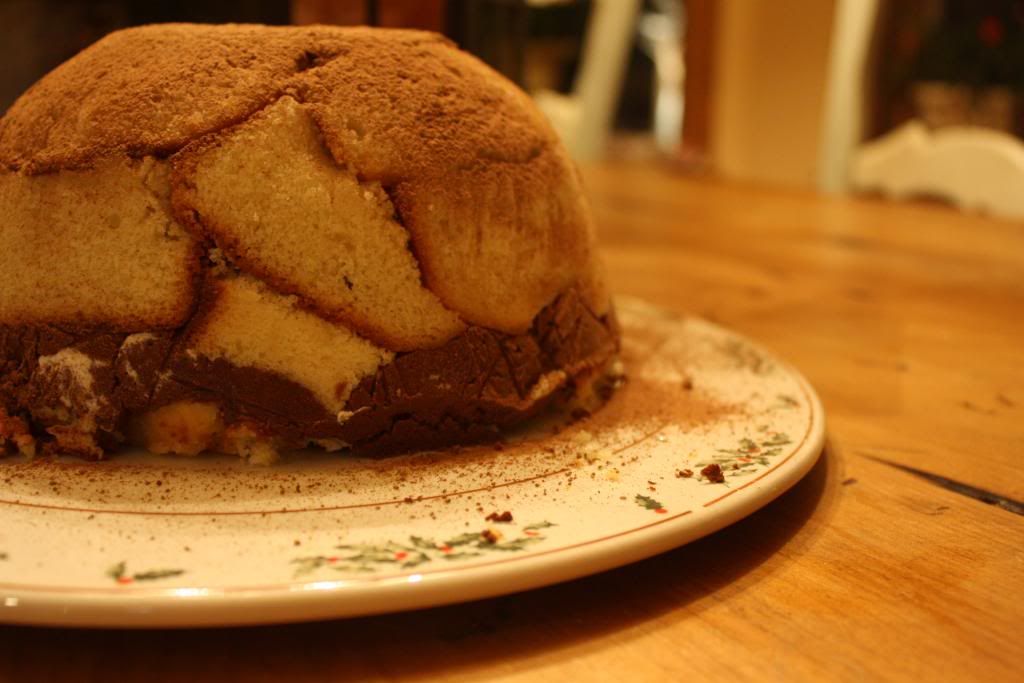
It turned out beautiful, like a little, perfect cake igloo! D'aw. It was a little too boozy for my tastes, but delicious nonetheless. 

But I've gotta go. It's time to eat more food! And then maybe take a nap. 


Zuccotto
From Baked Bree


Ingredients

1 (12-ounce) pound cake (you can make one or buy one, no judging)
1/4 cup amaretto
6 ounces bittersweet chocolate
2 cups whipping cream
1/2 teaspoon almond extract
1/4 cup powdered sugar
1/2 cup sliced almonds (toasted)
cocoa powder for dusting


Coat a large bowl (1 1/2 quarts) with cooking spray. Cover the cooking spray with plastic wrap and let the wrap hang over the edges. Slice the pound cake into thin slices, and cover the bowl with the pound cake. Save some slices for the top. Brush the cake with amaretto.
Melt the chocolate over a double boiler. Let cool.
Meanwhile, whip the heavy cream with the powdered sugar until thickened. Fold half of the cream into the chocolate mixture.
Spread the chocolate mixture on top of the pound cake.
Add the sliced almonds and almond extract to the remaining whipped cream. Fold gently until combined.
Add the almond whipped cream on top of the chocolate mixture.
Cover the top of the zuccotto with the remaining pound cake slices.
Chill for 3 hours, or overnight. Unmold onto a cake plate or platter.
Dust with cocoa powder and slice.

Saturday, February 4, 2012

Brown Sugar Coconut Bubble Tea

Ever since I was a little kid, I've had the tendency to get a one track mind about certain things. For example, I was convinced I was going to have a summer job washing dogs when I was younger (there's still one of my hand drawn promotional posters hanging in the house). Or the time I got really into Neopets (let's not talk about it...). And when I was 13 or 14, I somehow learned about bubble tea and became completely obsessed. 


My first bubble tea was consumed here and I have to admit, I didn't like it very much. The bubbles were little cubes! That's not what it looked like on the internet! I think honestly that the concept of chewing my drink was very cool in theory, but I didn't appreciate it in practice. But I would grow to acquire a taste for it.


If you're not familiar, the "bubbles" in bubble tea are large pearl tapioca, which, up until recently, I had a hard time finding. But they should be readily available at any asian grocery store. Don't try and substitute the small ones used in tapioca pudding...it's just not the same. The nice thing about making bubble tea at home is that you can control what goes into it. A lot of stores use weird, artificial flavor powders and lots of sugar. Mine used fresh brewed almond-coconut tea and coconut milk! Nom.


Brown Sugar Coconut Bubble Tea
adapted from The Pastry Affair


Yields 2 servings
1/2 cup large pearl tapioca
2 tablespoons brown sugar
1 cup black tea, cold
1 cup coconut milk
1/4 tsp coconut extract

To cook the tapioca, follow the directions on the package. Different brands of tapioca pearls cook at different rates and require varied amounts of water. Mine were a 5 minute variety, but if yours take longer to cook, it would be a good idea to cook more than a half cup if you'd like more bubble tea later in the week. When cooked, drain the pearls and rinse with lukewarm water to remove the starch. In a small bowl, coat the tapioca pearls with the brown sugar. The tapioca pearls can be refrigerated for up to 3 or 4 days, but are best if used immediately.
To make the bubble tea, blend together the black tea, coconut milk, and coconut extract. I used a cocktail shaker. If you want a thicker tea, I would combine the ingredients in a blender with some ice. In a tall glass, place 1/4 cup of tapioca pearls (but if you want more, add more!). Pour the tea over top. More brown sugar may be added to adjust the tea to your sweetness level. Drink with a large straw!

Monday, December 19, 2011

Secret Recipe Club - Chocolate Almond Risotto

 (Don't forget to enter my cookie giveaway, which closes tonight! I really want to make you something )

Hi everyone! By the time this is posted, I'll almost be done with finals. And what a sweet, sweet day that will be. Though I must admit, college finals seem much less stressful this semester than they did last year, and definitely less than high school. Oh high school, I do not miss thee at all. 


So for this month's Secret Recipe Club I was assigned the blog From My Sweet Heart. Anne has so many awesome ideas, I really want to try some of her frozen desserts recipes. And I love that she always includes a quotation with her post. I would highly encourage all of you to take a peek and see what's happening over there ^_^


I decided to try out her recipe for Chocolate Risotto, just because it was such a novel idea. I love savory risotto, but I never thought to make it into a dessert. I modified it a little and used chocolate almond milk instead of normal milk. So now it's gluten free AND practically vegan, if you use something besides butter to melt in the pan. Woo!


Chocolate Almond Risotto
 adapted from From My Sweet Heart


2 TBSP unsalted butter
3/4 c arborio rice
3-4 c almond milk (warmed in the microwave)
1 c mini chocolate chips
slivered almonds for sprinkling

As is similar to the regular risotto making process, melt the butter in a hot pan.  Add the rice and stir for a minute or so, until the rice is translucent.  Pour 1 cup of milk into the pan and stir until the milk reduces.   As the milk evaporates, add more milk, 1/2 c at a time.  Continue stirring on med heat.  Continue to repeat, adding milk 1/2 c at a time until you have used all the milk and the rice reaches the al dente stage.
Add the chocolate to the rice, and stir until all the chocolate has melted.  Continue to stir until the milk the mixture is blended and creamy.   Garnish with slivered almonds.  Serve immediately.


Sunday, July 17, 2011

Blueberry Almond Cake

We're all friends here, right? Since we've all gotten to know each other so well, I'm going to tell you about one of my stranger idiosyncrasies: my disgust with most small, round produce. 

I cannot explain how this started, but I know it goes back quite far. I have a vivid memory of my kindergarten class sitting in a circle on the floor, each person making a wish and then eating a grape (What the heck? I don't understand this ritual at all). I refused to eat that grape. Even if it meant causing a scene, even if it meant not getting a wish. To this day, I am repulsed by grapes, raisins, olives, capers, cherries, cherry tomatoes, blueberries...you get the idea. 

For some reason, I can handle blueberries baked into things, though they still aren't my favorite. Now, you may be wondering what's up with the weird looking pan above. It's called a Rehrucken pan, which means ribs of a deer. Apparently you're supposed to use it to make this sweet looking cake (which is supposed to look like a big hunk o' venison with garlic stuffed between the ribs. I think it looks a hedgehog). But our pan came with a recipe for an awesome and totally adaptable Scandinavian Almond Cake. 


Though I would have preferred mine without, we had blueberries in the house that needed to be used. Wanna make a lemon flavored one? Cut it in half and spread lemon curd inside. Coconut? Please do. 

Also....if anyone has a similar produce phobia, I'd love to hear about it so I don't feel like so much of a freak, haha. 

I didn't like touching those.

Blueberry Almond Cake 

Ingredients 

1 1/4 cups sugar
1 egg
2/3 cup milk
1 1/2 tsp almond extract
1 1/2 cups flour
1/2 tsp baking powder
1/2 cup melted butter
1 cup blueberries

Preheat oven to 350 and grease your pan (if you don't have a Rehrucken pan, I think a loaf pan would be okay)

Beat together sugar, egg, milk and almond until smooth. Mix in flour and baking soda. Slowly add melted butter. Gently fold in blueberries (you can dust them with flour to keep the batter from getting blue) Pour batter into pan, and bake for 38-42 minutes until top is golden brown. Cool in the pan for 6-8 minutes, then invert onto cooling rack.

Monday, May 9, 2011

Return of the Sun/Chocolate Almond + Salted Caramel Pudding Pops

Was making popsicles a big deal for you when you were young? I know it was for me. Breaking out the plastic molds (we had TWO kinds, a basic shape with a straw built into the handle for getting the slushy stuff out, and bear shaped ones. Fancy, I know) pouring watery lemonade into them....it somehow tasted so much better frozen. 


Mm. This weekend felt so much like summer. It made me so happy to finally feel the sun on my face. And there was a music festival thing going on at school, so behavior like this was occuring: 
 
No, I don't attend High School Musical University (Well, almost...)
It seemed like good popsicle weather. I decided to do pudding pops (which kind of taste like fudge pops but better) instead of something icy and fruity, and they were, but also incredibly hot to make. Standing in the cramped kitchen over a makeshift double boiler maybe was a poor choice in May. You can modify this recipe and do any type of pudding (I went with Chocolate Almond and Salted Caramel) you want, but take the extra time to make it from scratch. It's so worth it. 


Chocolate Almond + Salted Caramel Pudding Pops
adapted from Endless Simmer

makes approximately 1 dozen pops
Chocolate Pudding
  • 1/3 cup cornstarch
  • ½ cup granulated sugar
  • 3 cups cold whole milk
  • 3/4 cups dark chocolate, chopped
  • 1 tablespoon almond extract
Instructions:
Combine cornstarch, sugar, and whole milk in a bowl and whisk vigorously. Transfer mixture to a heat-proof bowl and place over (not on) simmering water for approximately 15-20 minutes, stirring occasionally. Pudding is ready when mixture coats the back of the spoon.  Add chocolate and stir to combine. Add almond and stir to combine.
Salted Caramel Pudding
  • 1/3 cup cornstarch
  • ½ cup granulated sugar
  • 3 cups cold whole milk
  • 1/2 cup salted caramel sauce (recipe follows)*
Instructions:
Combine cornstarch, sugar and whole milk in a bowl and whisk vigorously. Transfer mixture to a heat-proof bowl and place over (not on) simmering water for approximately 15-20 minutes, stirring occasionally. Pudding is ready when mixture coats the back of the spoon.  Add salted caramel and stir to combine.
*Salted Caramel Sauce
  • ½ cup granulated sugar
  • 2 tablespoons water
  • 2 tablespoons unsalted butter
  • 6 tablespoons of heavy cream
  • ½ teaspoons of kosher salt
Instructions:
Add sugar and water into a saucepan over medium low heat. Stir until sugar has dissolved. Use a wet brush to remove any crystals that form on the side. Once sugar has dissolved increase heat to high. Now and then, using the handle give the pot a swirl to keep the mixture moving. Do not stir the mixture directly. The mixture will start to bubble after a minute. As the mixture darkens to a medium amber color, approximately 5-7 minutes, add the butter and cream to saucepan. The mixture will bubble wildly. Whisk to combine (bubbles will subside upon cooling). Add salt and stir to combine.
Assembly:
For easy layering place cooled pudding in a pastry bag or Ziploc bag and cut the corner. (Or just spoon it in. Uglier but easier). Pipe alternating layers of chocolate and salted caramel pudding into a small Dixie type of cup. Place cups in the freezer for one hour until the pudding becomes semi firm, then place a popsicle stick in the middle an continue to freeze for another 2 hours.

Wednesday, December 22, 2010

Rainbow Cookie Comfort


Readers, it's been one of those draining sort of days. Not like I've done anything physically exhausting, but my head is just tired. To get my mind off of things, I made rainbow cookies, a labor intensive but rewarding process. 
Mixer, I love you. 
For the majority of my life, these cookies were a treat that could be procured only when visiting relatives in New York. Sometimes, relatives would mail them or bring some when they visited, and those days were extra awesome. 


Okay, so once upon a time, my mom made a raffle basket for some school function. Oddly enough, she won her basket back. Thinking she would probably just give it to someone else as a gift, she put it aside for later. On a whim, she flipped through the cookie book from the basket, and lo and behold, stumbled across a recipe for "Italian Tricolors". Also know as Rainbow Cookies. So we kept the book. And lived happily ever after. 

The special ingredient in these cookies is almond paste, or I guess you could call it marzipan. It's kind of expensive, but it gives them their signature taste and moist, cake-y texture. It's worth it for a special occasion. They're supposed to look like the Italian flag but they're kinda just Christmasy. So the timing is perfect for you to make some. 
Hm...so many cookies...know anyone who may want some? 

Rainbow Cookies

Ingredients
  • ounces almond paste
  • 3/4 cup sugar
  • 1/2 teaspoon almond extract
  •  3/4 cup butter, slightly softened
  • eggs
  • cup all-purpose flour, Sifted
  • 1/4 teaspoon salt
  • 15 drops green food coloring
  • 15 drops red food coloring
  • 2/3 cup raspberry preserves (pressed through a sieve to get rid of the seeds. You can also use apricot, that's easier. You just want the end result to be smooth.)
  • ounces semisweet chocolate
  • teaspoon vegetable shortening

Directions
  1. Preheat Oven to 350 degrees.

  2. Grease 3 8"x8" metal baking pans. After greasing, line the bottoms of the pans with wax paper, smoothing the paper down onto the pan. Grease the tops of the wax paper and then flour the pans. Put aside.
  3. In a large mixing bowl, Beat together on medium-high speed the Almond Paste, Sugar, Almond Extract and butter until well blended. (there might be some small lumps of Almond Paste remaining and that's fine.).
  4. Reduce speed to medium and beat in the eggs one at a time until blended. Reduce speed to low and then add the flour and salt slowly to the mixture until combined.
  5. Take two small bowls and add 1 rounded cup of batter into each bowl. (there should be another rounded cup of batter still in the original mixing bowl.). Add 15 drops of red food color to one bowl and 15 drops of green food color to the other. Stir each bowl until evenly blended with color.
  6. Spoon the untinted batter into one pan. With the back of a spoon, spread batter evenly (layer will be about 1/4 inch thick). Repear with red batter in second pan and green batter in remaining pan.
  7. Bake until set and toothpick inserted in center of layers comes out clean. 10-12 minutes. Cool in pans on wire rack about 1/2 hour. Cake should be cool to the touch.

    1. Lay a piece of wax paper on a flat surface that will be able to fit in refrigerator. Or garage if it's cold like it is here. Take the green layer and flip over pan onto wax paper. Gently pull off the wax paper. Spread 1/3 cup of raspberry preserves onto the green layer.

    2. Take the untinted layer and remove from pan. Place it onto the green layer with the wax paper side up. Press down gently and then remove the wax paper.Spread remaining 1/3 cup of Apricot preserves onto the untinted layer. Take the remaining red layer and remove from pan and place upon the white layer again with the wax paper side up. Press down gently and remove the wax paper.
    3. In a 1 quart saucepan (or uh, the microwave), heat chocolate and shortening over low heat, stirring frequently, until melted.Spread melted chocolate mixture on top of the red layer evenly. Do not put mixture on sides.
    4. Refrigerate until chocolate is firm, at least 1 hour. (at this point, if you want, you can cover and refrigerate for up to 3 days before serving).
    5. To serve, with a large sharp knife, trim about 1/4 inch from the edges. Cut the stacked layers into 6 strips. Cut each strip crosswise into 6 pieces. You will get 36 square cookies from this. Keep in the fridge!