Sunday, August 26, 2012

I dislike red velvet.


There, I said it. I find that darling of the cake world, red velvet, vastly overrated and a little bit perturbing. Maybe it's because the first time I ever recall having it was at summer camp (an incredibly traumatic experience. I cried every day until they let me leave early.), where red velvet was talked up beyond belief but turned to taste just like a dried out grocery store sheet cake that happened to be red. Maybe it's because there's too much cocoa in it to taste like a yellow cake but not enough for me to consider it chocolate cake. Or maybe it's the food coloring. 


I am inherently suspicious of too much artificial food coloring. Especially red. Probably because as recently as 1982, scientists discovered that certain food dyes cause cancer and other health problems. I mean, it's worrisome to me that it's taken us until red dye #40 to find something that's safe, and it's still been known to cause allergic reactions in some people. The almost fluorescent quality of red velvet batter invoked this perverse fascination in me.

Sorry for being so negative! It's not going to kill you to have some red velvet cake once in a while. And I'm not the kind of baker who will refuse to make someone's absolute favorite just because it's not something I enjoy very much. Just to make sure I wasn't going to be feeding anyone poison, I tried one. It had a wonderful, slightly crunchy top and moist, but somehow airy texture. If I could find a way to harness the power of beets (next time I'm trying this recipe!) I think I might actually enjoy red velvet!


Red Velvet Cupcakes 
by McCormick

2 1/2 cups flour
1/2 cup unsweetened cocoa powder
1 teaspoon baking soda
1/2 teaspoon salt
1 cup butter, softened
2 cups sugar
4 eggs
1 cup sour cream
1/2 cup milk
1 (1 ounce) Red Food Color
2 teaspoons Pure Vanilla Extract 

Preheat oven to 350 degrees F. Mix flour, cocoa powder, baking soda and salt in medium bowl. Set aside.
Beat butter and sugar in large bowl with electric mixer on medium speed 5 minutes or until light and fluffy. Beat in eggs, one at a time. Mix in sour cream, milk, food color and vanilla. Gradually beat in flour mixture on low speed until just blended. Do not overbeat. Spoon batter into 30 paper-lined muffin cups, filling each cup 2/3 full.
Bake 20 to 25 minutes or until toothpick inserted into cupcake comes out clean. Cool in pans on wire rack 5 minutes. Remove from pans; cool completely. Frost with cream cheese frosting.

Monday, August 20, 2012

My Other Blog - Banana Cake and the Last Post

Guys, I'm so sad! My internship is over. It's very bittersweet. I can't even express how thankful I am that I had this experience. Not only have my writing skills improved, but so have my somewhat sub-par people skills! At least I hope so. I'm not so nervous about picking up the phone as I was when I started in June. I wish I never had to leave! But alas, the mysterious lure of Minnesota pulls me back. Haha. Anyway, here's my final blog entry


If people at FCM are reading this, stay in touch, please! You guys are pretty cool.

Monday, August 13, 2012

Secret Recipe Club - Pumpkin Whoopie Pies + Mascarpone Filling

Ah, the final Secret Recipe Club of the summer. Next time around, I'll be back in a new and exciting dorm kitchen. Who knows what the future may hold? I'm okay with going back to school. I enjoy my time here, and I enjoy my time there. My mom commented that as I've gotten older, I've grown less restless. It's easy for me to be content with where I am. But not complacent. Let's not get those two confused. But on to the food, shall we? 


My assignment for this month was actually my SRC group's leader, Suzanne! Oh man, I hope she likes what I make! Will I get kicked out if she doesn't? Haha, I don't think so, she seems pretty cool. So I'm safe for now! Anyway, I know pumpkin is usually considered a fall flavor, but I do what I want! Cause I'm a rebel. 

This one looked messy, so I ate it instead of bringing it to work, haha.

Who came up with the name Whoopie Pie? Saying it makes me feel silly. So I usually just sort of mumble it and hope people get the gist. But man oh man are they awesome. If you've never had one, it's like a soft, cakey cookie with whatever the heck you want sandwiched in the middle. Like a macaron's less fancy cousin? Maybe. Okay also, and I highly, highly recommend doing this, I made my own mascarpone for the filling. It's so wonderful, and easy, and way cheaper than buying it in the store. I'll include a tutorial after the recipe.


Pumpkin Whoopie Pies + Mascarpone Filling

1 1/2 c Pumpkin Pie Filling or Puree
2 Tbsp Maple Syrup
1 tsp vanilla
1/4 tsp ground Ginger
1 whole egg
1/2 cup Grapeseed Oil
1 cup packed Brown Sugar
1/2 tsp Baking Soda
1/2 tsp Baking Powder
Pinch of Salt
1/2 tsp Pumpkin Pie Spice
2 cups all-purpose flour
Ingredients for the filling:
8 oz Mascarpone Cheese
1/4 cup Powdered Sugar
1/2 tsp Vanilla
1/4 tsp Pumpkin Pie Spice

Mix the pumpkin, syrup, vanilla, ginger, egg, oil, and brown sugar in a big bowl and whisk until everything is smooth and incorporated.
Add the salt, baking soda, baking powder and flour and mix together.
Heat oven to 350ºF and line cookie sheets with parchment paper (or grease the pans lightly).  Spoon on batter in 2″ (mine were more like 2.5) rounds.
Place in the oven and bake for about 14 minutes.  When they turn a bit brown and crack a little, they’re done! Let them cool completely before filling.
To make the filling...mix everything together. Haha. Using a knife or pastry bag, swirl on some filling to a cookie.  Top with another cookie. If the filling seems a little gooey, place pies in the refrigerator for about 30 minutes to stiffen the filling.

Homemade Mascarpone

2 cups heavy cream, pasteurized (but not ultra-pasteurized)
1 tablespoon lemon juice, freshly squeezed
In a large saucepan, heat heavy cream over medium high heat until a candy thermometer reads 190 degrees F (88 degrees C). The cream should be at a simmer. Be careful not to scorch the bottom! Stir in the lemon juice and continue to heat at 190 degrees F (88 degrees C) for 5 minutes, stirring constantly. The cream should thicken enough to coat the back of a spoon. Remove from heat and allow to cool to room temperature, about 30 to 45 minutes.
Place a strainer lined with 4 layers of cheesecloth (or a few layers of coffee filters) over an empty bowl. Add the cream, cover with plastic wrap, and place in the refrigerator. Allow the cream to strain out for 8-12 hours, preferably overnight. Discard the whey; I only ended up with a couple tablespoons. When finished straining, transfer the cheese to an airtight container and store in the refrigerator.
Use fresh mascarpone cheese within the week.


Friday, August 10, 2012

Marshmallows!

"Why are you making marshmallows? They're like a dollar a bag," my mom asked me, echoing the question that's already been asked about four times. I scowled and shook my head.
"It's not the same at all! They're so much better. I'll prove it to you," I promised. And besides, they'd been on my to-do list for a while (and on the Sweet 100 List, which I'm kind of determined to complete someday). So when a friend offhandedly mentioned that he'd been wanting to make homemade marshmallows, I jumped on that opportunity. 


Marshmallowery is a good intro to candymaking, since you're working at fairly low temperatures (relatively speaking. Do NOT touch the boiling sugar). I still consider myself a novice in the field, having never really worked with sugar past the firm ball stage of cooking (around 250ºF). So if the project failed for some reason, I probably wouldn't ruin any pans or hurt myself too much.


Though it's possible to do it alone, I recommend doing any sort of candymaking with a friend (or enemy, if you're into that sort of thing). It's nice to have an extra pair of hands, since everything has to move fairly quickly. And it's fun to have someone to poke marshmallows with. Remember to put some in your pocket for secret eating!


Marshmallows
Notes - Our marshmallows had a layer of toasted coconut on the bottom, but you should do whatever flavor you want. The possibilities are endless. I have my eye on mint chocolate chip for next time. Additionally, we also 2/3'd the recipe, since I only had an ounce of gelatin. Do what you need. Still made more than enough.

1.5 ounces gelatin
8 ounces cold water (or coffee, mmmmm, coffee marshmallows…)
11 ounces corn syrup, honey, or maple syrup
8 ounces water
28 ounces sugar
1/2 tsp kosher salt
1 vanilla bean, seeds scraped and pod reserved for another use
ample powdered sugar for dusting (1 cup or more)
Unless you have a supercharged motor on your hand mixer, I don’t think it will survive this recipe. Use a stand mixer if at all possible.
Have a lightly greased 9”x13” pan at the ready.
So. Combine the gelatin and water together in the bottom of a stand mixer bowl. Set aside.
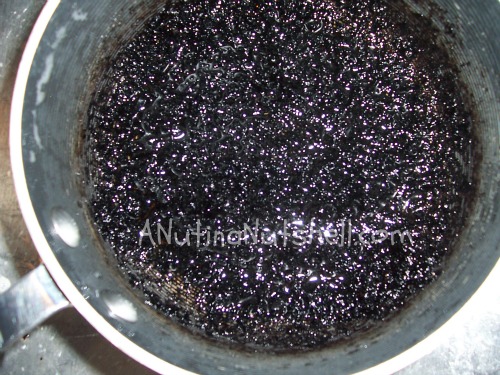
In a medium sized heavy bottomed pot, combine the syrup, water, sugar, salt, and vanilla bean scrapings. Set over medium heat and stir gently, taking care to not splash liquid (and thus sugar crystals) up the sides of the bowl. Once the mixture starts to simmer, stop stirring and put a lid on it for 5 minutes, letting it go to town (this lets some steam build up in the pot to “steam off” any sugar crystals stuck on the sides of the pot.).
Warning: if you use honey, the smell will be awful. Barnyard and hay and all kinds of musty awful. The end result will taste awesome, but getting there will fill you with doubt. Hold the course. It’ll get better. Mine smelled likes cows even though I used corn syrup. Hmm...
After 5 minutes, remove the lid and stick in a candy thermometer.
Keep cooking, undisturbed, until the mixture reaches 240°. Then shut off the heat and let it stand until it cools to 210°. This is important.
Once the mixture has cooled to 210°, and taking a goodly amount of caution as this mixture is super hot, pour all of it into the mixing bowl with the awaiting gelatin. Fit the bowl with the whisk attachment and crank it up to medium-high speed.
You are gonna let this thing whip it, whip it good until the mixture has really increased in volume, doubled? tripled? It will nearly exceed the bowl at any rate.
Once you’ve shut off the mixer, move quickly. There’s no delicate way to put this: it’s gonna be a sticky mess. But that’s half the fun, so don’t stress it. Set the whisk attachment aside (or give it to a small child if you really want to see what a mess looks like) and scrape the marshmallow goo into the prepared pan.
Get your fingers a little damp and pat down the mixture. Lift up and smack the pan a few times against the counter to dislodge any air bubbles and help it level out more. The goal is for more or less even.
Dust the top of the giant marshmallow with some powdered sugar (I forgot to do this....getting the plastic off was such a pain!), cover in plastic and refrigerate 4 hours or overnight.
Rejoice! You’ve done all the hard work, now for the best part!!!
Get a cutting board ready by dusting it with powdered sugar. Take your pan of chilled marshmallows and literally reach your fingers between the ‘mallow and the pan, and pull that guy right outta there.
You’re now holding one giant marshmallow pillow
Dust the exposed bottom of the ‘mallow with some more powdered sugar.
Use a hot knife to cut the marshmallows into about 13, 1” strips. You’ll have to stop periodically and clean your knife. Once the strips are cut, roll them about in some powdered sugar so none of the sides are sticky.
Now use the knife to cut each strip at 1” increments. Of course, the marshmallows are probably close to 2” tall, so they won’t be perfect cubes, but rather rectangles.
Toss these cut pieces in more powdered sugar to prevent them from sticking.
So store these guys in an airtight container or a big zippy bag. They’re essentially nothing but sugar, so they have a terrific shelf life. Weeks. Months even, if you refrigerate them. A year in the freezer.


Wednesday, August 8, 2012

My Other Blog - Thai Eggplant Curry

Hello everyone, I seem to be recovering from my tooth removal quite well (no more ice pants, ability to chew my beloved summer peaches). This is something I made a while ago, but kind of hemmed and hawed about posting because I didn't particularly enjoy the finished result. But I am just one person. So see for yourself! 

Hooray for food trucks!

Friday, August 3, 2012

Custard Eggs

Ugh. Yesterday, I got my wisdom teeth out. Thankfully I seem to be recovering quite well, though I am a bit puffy and sore. My brilliant mother came up with the idea of tying a pair of pants filled with bags of ice around my head, which is surprisingly effective. And I suspect it will become the newest fashion trend. 


Yesterday all I ate was soft, cold stuff. Which was great at first, until I wanted something more substantial. And until my dad brought home a big, glorious box of peaches. Sigh. But I'm grateful for the fact that I haven't had any major tooth issues, even if it means I'm slightly hungry all the time. 


Today I am allowed to progress to soft, warm foods, and I knew the perfect thing. Eggiwegs! (gotta brush up on my Nadsat). Last summer, I made these scrambled eggs that were slow cooked over a really low burner, and they turned into this delicious, custardy mush. Mmm. They were perfect. Some people are thrown off by the texture, because they're completely smooth and creamy, but I think it's awesome. And it's nice to have something with more significant amounts of protein again. If you have any good wisdom teeth foods, share them here!


Custard Eggs

Crack two or three eggs into a bowl and whisk thoroughly. Don't add salt, pepper, milk, anything. Transfer to a nonstick pan on a burner set to the lowest heat possible. Stir continuously with a silicone spatula so no curds form. You want to avoid hot spots, and no part of the pan should ever exceed 160ºF. Continue stirring until eggs have reached a custard like consistency. This takes anywhere from 15-30 minutes.