Thursday, December 27, 2012

Daring Bakers - Panettone!

The December 2012 Daring Bakers’ challenge was hosted by the talented Marcellina of Marcellina in Cucina. Marcellina challenged us to create our own custom Panettone, a traditional Italian holiday bread!

Oy, I almost forgot to post this, which would have been a shame, because a lot of work went into it! It hit me last night, but I was tooooo tired. All this lounging, you know, it's a lot of work.


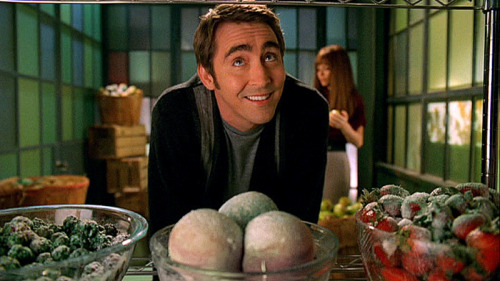
I kind of internally cringed when I heard the challenge this month was Panettone (which I have an incredibly difficult time spelling, by the way). To me, it's basically a small step up from fruitcake in terms of deliciousness, fruitcake being at all bottom of the hierarchy of baked goods. I. Do. Not. Like. Dead. Fruit. Unless it's in the hands of Ned the Piemaker (swoon)


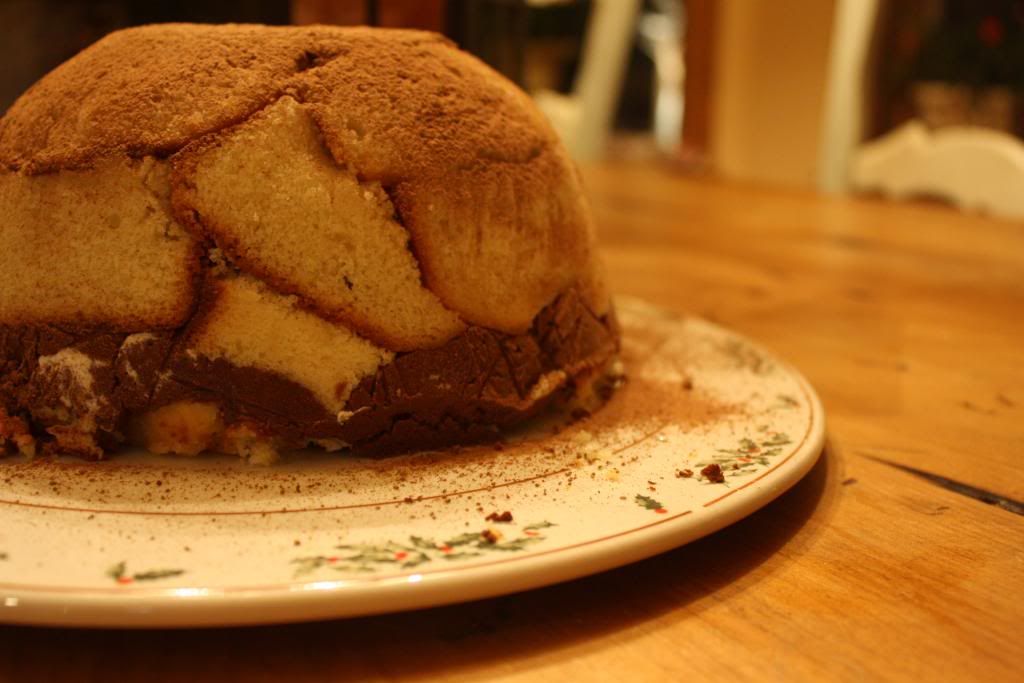
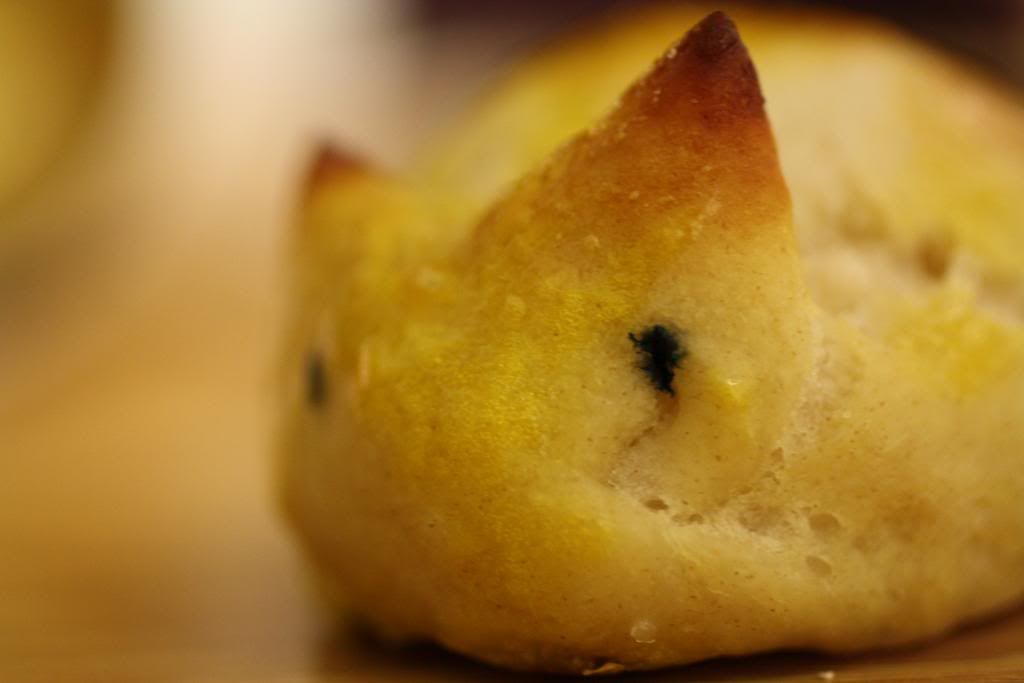
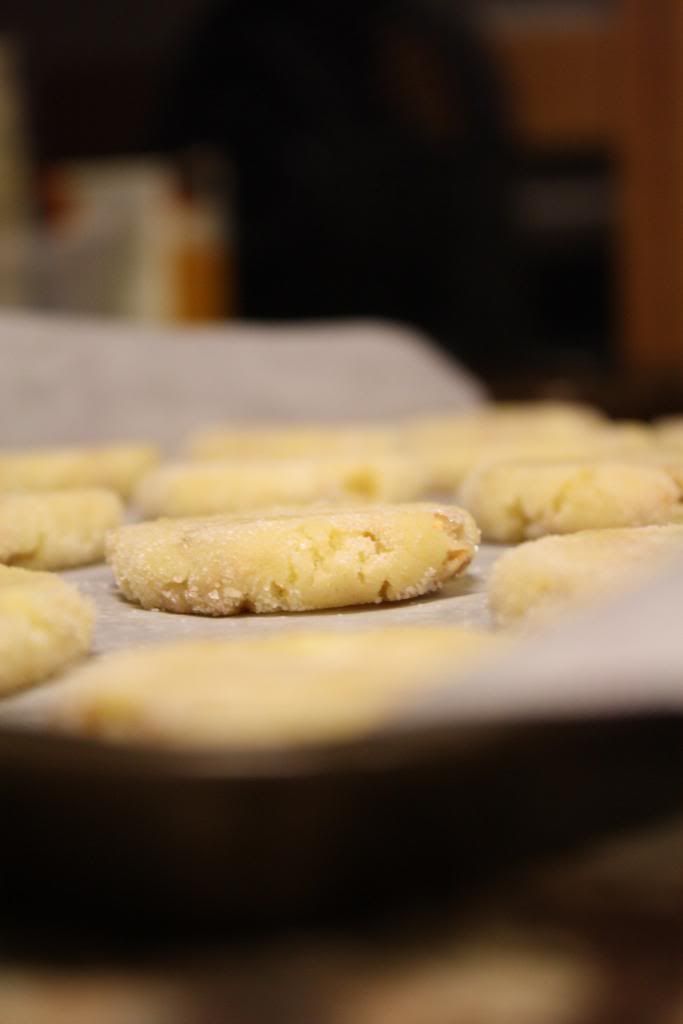
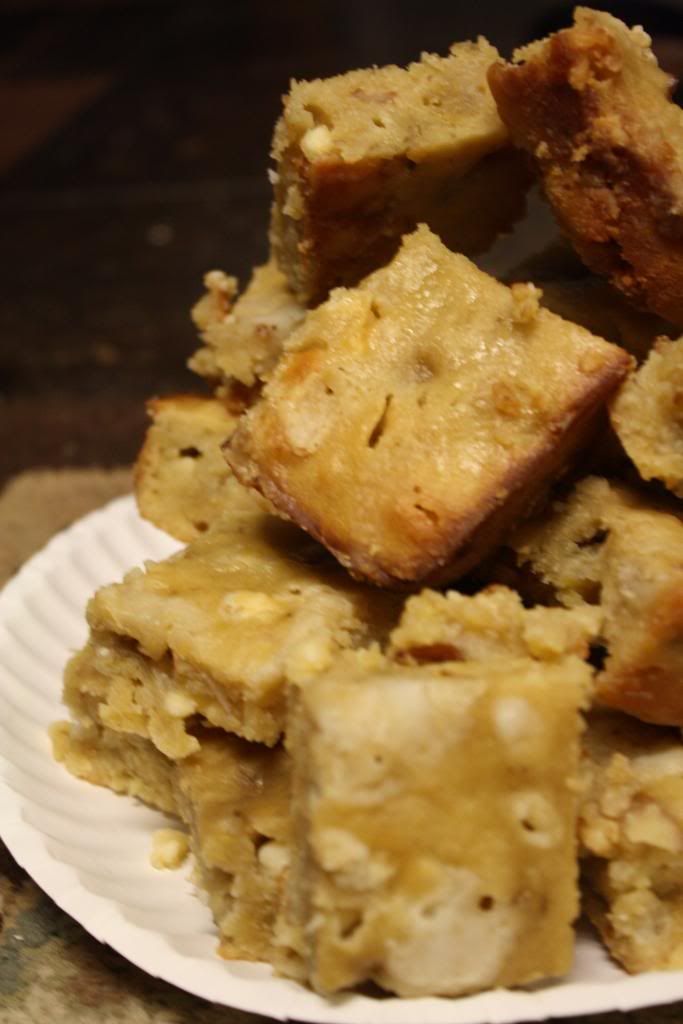
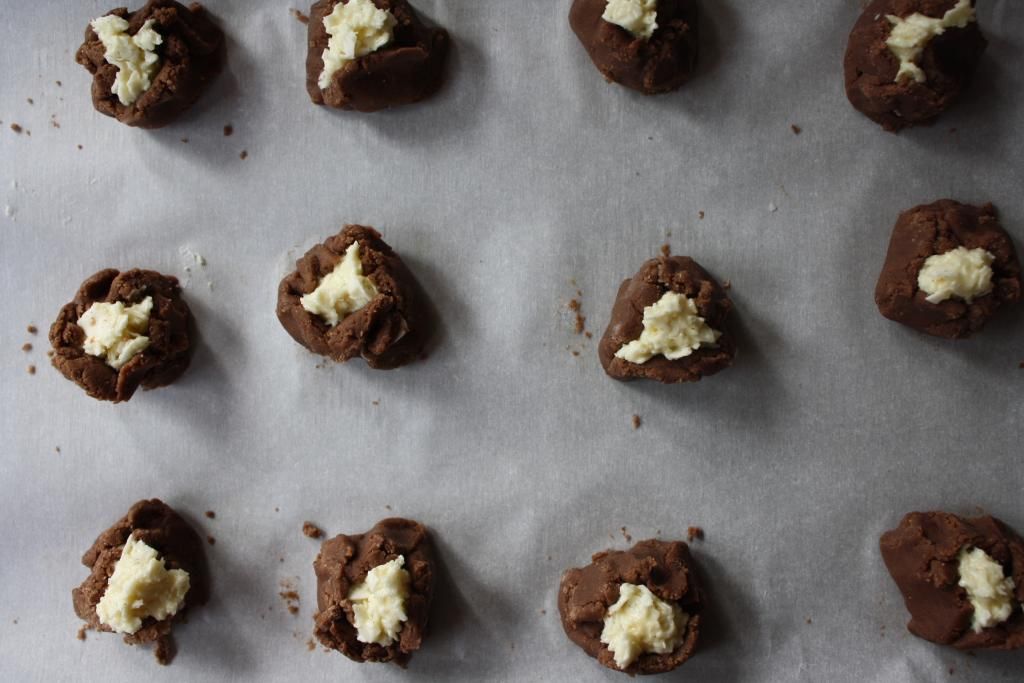
Chocolate and nuts is more my speed. So instead of candied citrus I used almonds, hazelnuts, and chocolate. Oh yeah. It's still not my favorite thing in the world, but I really enjoyed making this bread and have a greater appreciation for the work that goes into it. Know that this is not something you can whip up on a whim...it takes planning and many hours. PS: There's an optional almondy topping you can make, but I decided to go without, and use the extra egg whites to make these gluten free cookies for my sister. Everyone wins. 


Chocolate and Nut Panettone (makes two large)

Ingredients
Sponge
1 satchel (2¼ teaspoons) (7 gm) active dry yeast
1/3 cup (80 ml) warm water
½ cup (70 gm) unbleached all purpose flour

First Dough
1 satchel (2¼ teaspoons) (7 gm) active dry yeast
3 tablespoons (45 ml) warm water
2 large eggs, at room temp
1¼ cup (175 gm) unbleached all-purpose (plain) flour
¼ cup (55 gm) (2 oz) sugar
½ cup (1 stick) (115 gm) unsalted butter, at room temp

Second dough
2 large eggs
3 large egg yolks
2/3 cup (150 gm) (5-2/3 oz) sugar
3 tablespoons (45 ml) honey
1 tablespoon (15 ml) vanilla extract
1 teaspoon almond extract
1 teaspoon (5 ml) (6 gm) salt
1 cup (2 sticks) (225 gm) unsalted butter, at room temp
3 cups (420 gm) (15 oz) unbleached all-purpose (plain) flour; plus up to (2/3 cup) 100 gm for kneading

Filling and final dough
1½ cups (250 gm) (9 oz) almonds and hazelnuts, chopped and toasted
½ cup (75 gm) (2-2/3 oz) semisweet chocolate chips
2 to 3 tablespoons (30-45 ml) (15-25 gm) unbleached all-purpose (plain) flour


Sponge
  1. Mix the yeast and water in a small bowl and allow to stand until creamy. That’s about 10 minutes or so. Mix in the flour. Cover with plastic wrap and allow it to double in size, about 20-30 minutes.
First Dough
By hand:
  1. Mix the yeast and water in a large bowl and allow to stand until creamy. Again, about 10 minutes or so
  2. Mix in the sponge and beat well with a wooden spoon
  3. Stir in the eggs, flour and sugar.
  4. Mix in the butter well
  5. This should only take about 5 – 6 minutes
  6. Cover with plastic wrap and allow double in size, about 1 – 1 ¼ hours
By Mixer:
  1. In the mixer bowl, mix together the yeast and water and allow to stand until creamy. Again, about 10 minutes or so
  2. With the paddle attached mix in the sponge, eggs, flour, and sugar.
  3. Add in the butter and mix for 3 minutes until the dough is smooth and even. Cover with plastic wrap and allow double in size, about 1 – 1 ¼ hours
Second dough
By Hand:
  1. Be sure to have your dough in a large bowl as above.
  2. With a wooden spoon mix in eggs, egg yolk, sugar, honey, vanilla, essences/extracts and salt.
  3. Mix in the butter.
  4. Then add the flour. Stir until smooth.
  5. At this stage the dough will seem a little too soft, like cookie dough.
  6. Turn it out and knead it on a well-floured surface until it sort of holds its shape. Don’t knead in too much flour but you may need as much as 2/3 cup (100 gm). Be careful the excess flour will affect the finished product.
By Mixer:
  1. With the paddle mix in thoroughly the eggs, egg yolks, sugar, honey, vanilla, essences/extracts, and salt.
  2. Mix in the butter until smooth.
  3. Add the flour and slowly incorporate.
  4. At this stage the dough will seem a little too soft, like cookie dough.
  5. Replace the paddle with the dough hook and knead for about 2 minutes. Turn out the dough and knead it on a well-floured surface until it sort of holds its shape.
  6. Don’t knead in too much flour but you may need as much as 2/3 cup (100 gm). Be careful the excess flour will affect the finished product.
First Rise
  1. Oil a large bowl lightly, plop in your dough and cover with plastic wrap
  2. Now we need to let it rise until it has tripled in size. There are two ways to go about this.
  • Rise in a warm place for 2 – 4 hours
  • Or find a cool spot (64°F -68°F) (18°C – 20°C) and rise overnight
  • Or rise for 2 hours on your kitchen bench then slow the rise down and place in the refrigerator overnight. 
Filling and Final Rise:
  1. Combine all filling ingredients and mix well
  2. Divide dough in half and press out one portion into an oval shape
  3. Sprinkle 1/4 of the filling over the dough and roll up into a log
  4. Press out again into an oval shape and sprinkle over another quarter of the filling
  5. Roll into a log shape again.
  6. Repeat with the second portion of dough
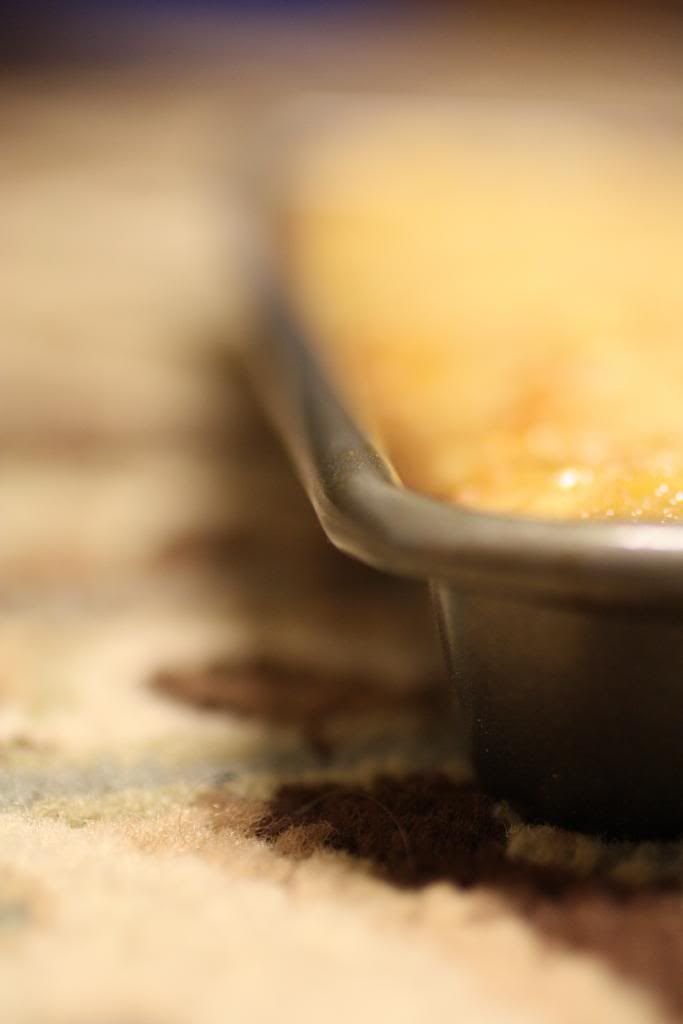
  7. Shape each into a ball and slip into your prepared pans, panettone papers or homemade panettone papers.
  8. Cut an X into the top of each panettone and allow to double in size.
  9. Rising time will vary according to method of first rise. If it has been in the refrigerator it could take 4 hours or more. If it has been rising on the kitchen bench in a warm place it should be doubled in about 2 hours.
Baking
  1. When you think your dough has only about 30 minutes left to rise preheat your oven to moderately hot 400°F/200°C/gas mark 6 and adjust your oven racks
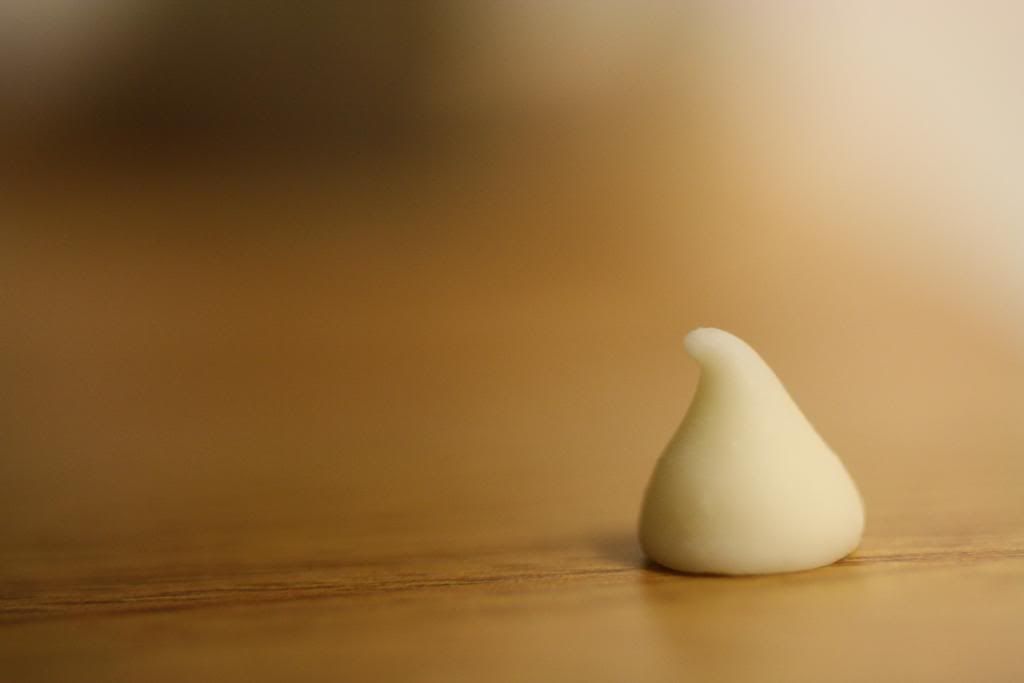
  2. Just before baking carefully (don’t deflate it!) cut the X into the dough again and place in a knob of butter.
  3. Place your panettone in the oven and bake for 10 minutes
  4. Reduce the heat to moderate 350°F/180°C/gas mark 4 and bake for another 10 minutes
  5. Reduce the heat again to moderate 325°F/160°C/gas mark 3 and bake for 30 minutes until the tops are well browned and a skewer inserted into the panettone comes out clean.
  6. Cooling your panettone is also important. If you have use papers (commercial or homemade) lie your panettone on their side cushioned with rolled up towels. Turn gently as they cool. If you have used pans cool in the pans for 30 minutes then remove and cushion with towels.
  7. Panettone can also be cooled suspended. How to do this? Firstly you need to use papers (commercial or homemade), insert clean knitting needles into the bottom of the panettone in a X shape. Flip over and support the knitting needles on the edges of a large saucepan with the panettone suspended within the saucepan. Yep, a lot of trouble and I didn’t really find that much difference – maybe I took too long to insert the needles.
OPTIONAL!
Almond Glaze for Panettone
Ingredients
1 cup (140 gm) (5 oz) whole blanched almonds
1 cup (125 gm) (4 ½ oz) confectioners' (icing) sugar
2 tablespoons (18 gm) (2/3 oz) whole wheat flour
3 large egg whites
3 tablespoons (45 ml) good quality extra virgin olive oil
Few drops of almond essence, to your taste
Pearl sugar, flaked almonds or course sugar to decorate

During the final rise, prepare the almond glaze. Process almond, confectioners’ sugar and flour until the nuts are finely chopped and well blended. Mix in the egg whites, oil and essence. Process to combine. It is meant to be thick and glue like. All is well! When the panettone are well risen carefully spread half the mixture over the top. Don’t worry about spreading it to the edges, in fact keep well away from the edges because the glaze will melt and spread. Bake as per the panettone recipe above.


Tuesday, December 25, 2012

Zuccotto


Merry Christmas, friends! I hope your holidays have been filled with love and family and relaxation and delicious foods. I've basically been on a rotation of sleeping, reading, playing this game, and eating. We did our Italian, scaled down version of Feast of the Seven Fishes last night, and it was quite tasty. Lobster and clams are kind of a rarity in the midwest.


A while back OXO sent me some strange tiny measuring beakers for small amounts of liquids. I've been deliberating about how to use them for a while, and then remembered thatI've been wanting to make this super cute dessert called Zuccotto for a while. Zuccotto means little pumpkin in Italian, which is adorable, and it's traditionally a chilled, hemispherical dealie made with cake, ice cream, and brandy. The version I found used pound cake, chocolate, amaretto, and almond whipped cream, which is a is a little more my speed. The amaretto and almond extract were perfect in my measuring beakers, and made me feel like I was doing science things instead of just baking.


It turned out beautiful, like a little, perfect cake igloo! D'aw. It was a little too boozy for my tastes, but delicious nonetheless. 

But I've gotta go. It's time to eat more food! And then maybe take a nap. 


Zuccotto
From Baked Bree


Ingredients

1 (12-ounce) pound cake (you can make one or buy one, no judging)
1/4 cup amaretto
6 ounces bittersweet chocolate
2 cups whipping cream
1/2 teaspoon almond extract
1/4 cup powdered sugar
1/2 cup sliced almonds (toasted)
cocoa powder for dusting


Coat a large bowl (1 1/2 quarts) with cooking spray. Cover the cooking spray with plastic wrap and let the wrap hang over the edges. Slice the pound cake into thin slices, and cover the bowl with the pound cake. Save some slices for the top. Brush the cake with amaretto.
Melt the chocolate over a double boiler. Let cool.
Meanwhile, whip the heavy cream with the powdered sugar until thickened. Fold half of the cream into the chocolate mixture.
Spread the chocolate mixture on top of the pound cake.
Add the sliced almonds and almond extract to the remaining whipped cream. Fold gently until combined.
Add the almond whipped cream on top of the chocolate mixture.
Cover the top of the zuccotto with the remaining pound cake slices.
Chill for 3 hours, or overnight. Unmold onto a cake plate or platter.
Dust with cocoa powder and slice.

Monday, December 17, 2012

Pretzel Bunnies

I'm moving out. 

It makes me a little panicky to see empty space in the corner where my futon was, to see my life neatly (well, maybe not so neatly) packed up into boxes. New chapter's beginning soon. Just have to get through this darn accounting final first. If you need someone to do a balance sheet or income statement for you...I'm your gal. Y'know, if you're not into letting professionals handle that sort of thing for you. 


Some of my friends who had been away all semester stopped by on Saturday, and it just felt so right to have them back. Telling amazing stories about their experiences, discussing everything from Nicaraguan government to Cabin in the Woods.
I missed these late nights. But as soon as everyone returns, I'll be gone. But I can't miss my own adventures because I'm too busy thinking about the ones happening at home. 


If I was a better storyteller, I'd be able to find a way to connect these pretzel bunnies with the above ideas. But...not quite there yet. But these cute lil' buns are a great way to use up that last egg, that bit of flour, you get the idea. 

I'll be back home, baking up a storm for the next couple weeks. But after that, changes are coming. I'm getting closer to coming to terms with the fact that this is real. 


Pretzel Bunnies
by Kirbie's Cravings

3/4 cups warm (110 to 115 degrees F) water
1/2 tablespoon sugar
1 teaspoons salt
1 1/8 tsp active dry yeast
2 1/4 cups all purpose flour
1 ounce unsalted butter, melted
1/3 cup baking soda
1 egg yolk


1. Combine the warm water, sugar and salt in the bowl of a stand mixer and sprinkle the yeast on top. Allow it to sit for about 5 minutes. Add the flour and butter and using the dough hook attachment, mix on low speed until well combined. Change to medium speed and knead about 5 minutes until the dough is smooth and pulls away from the side of the bowl. Remove the dough from the bowl, and place the dough in a glass bowl oiled with vegetable oil. Cover with plastic wrap and let rise in a warm place for approximately 50 to 55 minutes or until the dough has doubled in size.
2. Take a chunk of dough about the size of a ping pong ball and roll into an oval shape. Repeat with remaining dough.
3. Preheat the oven to 450 degrees F. Using a large sauce pan, fill with water. Bring the water to a boil and add the baking soda.
4. Place the pretzels into the boiling water for 30 seconds, a few at a time. Make sure to gently place in and don't let the dough roll around too much in order to preserve the oval shape and so the dough doesn't get too wrinkled or bubbled. Remove them from the water using a large flat spatula. Place pretzels on baking sheet lined with parchment paper or silpat mat.
5. Using kitchen shears, cut two ears. Beat one egg yolk. Brush the top of each pretzel bunny with the beaten egg yolk. Bake until dark golden brown in color, approximately 8 minutes. Add eyes with edible marker or food coloring after pretzels have cooled.

Wednesday, December 12, 2012

The Great Food Blogger Cookie Swap!

I love when I can use my passions to help other people. So when I caught wind of the Great Food Blogger Cookie Swap, I jumped at the opportunity to bake for a good cause. Food bloggers from all around the word gathered together to partner with Cookies For Kids' Cancer, an organization dedicated to finding new ways to fight pediatric cancer. Here's their mission statement:

Cookies for Kids' Cancer is committed to raising funds to support research for new and improved therapies for pediatric cancer, the leading cause of death by disease for children under the age of 18. Through the concept of local bake sales, Cookies for Kids' Cancer provides the inspiration and support for individuals, communities, and businesses to help fight pediatric cancer. 


Additionally, my beloved OXO promised to match every donation made by the bloggers of the cookie swap, up for $100,000 dollars. I think that's pretty awesome. They gave us some pretty sweet spatulas as well. I am amazed by people's generosity. Whenever I'm feeling generally angsty about humanity, I can just think of things like this cookie swap and feel better. 


For my cookie contribution, I wanted to make something that was sturdy enough to last in the mail but still delicious and not rock-like. These butter toffee cookies are perfect. They've got some substance to them and stack nicely, but still have a delicious chewy center. I hope they were still good upon arrival! 

Overall, the cookie swap was a wonderful experience and I'm so glad I got to take part. If you're interested in hosting your own bake sale or donating, head on over to Cookies for Kids' Cancer's website to get more information. I'm sure it will be appreciated.  '


Butter Toffee Cookies
from Land O' Lakes
makes 3 dozen

1 cup sugar
3/4 cup butter, softened
1 egg
1 teaspoon vanilla
2 cups all-purpose flour
1 1/2 teaspoons baking powder
1/4 teaspoon baking soda
1/2 cup English or almond toffee bits
Sugar for rolling

Heat oven to 350°F. Combine sugar, butter, egg and vanilla in large bowl. Beat at medium speed, scraping bowl often, until creamy. Add flour, baking powder and baking soda; reduce speed to low. Beat until well mixed. Stir in toffee bits by hand.

Shape dough into 1-inch balls. Roll in sugar. Place 2 inches apart onto ungreased cookie sheet. Flatten each with bottom of glass to 1 1/2-inch circles. (If glass sticks, dip glass in sugar.)


Bake for 9 to 11 minutes or until edges are just lightly browned. (Do Not Over Bake.) Sprinkle with sugar while warm. Cool completely.


Monday, December 3, 2012

White Chocolate + Almond Banana Bars

Don't ask me why I did it. Maybe it's to strengthen my food street cred. Maybe it's because I'm still at the age where trying food because you know it's bad is still appealing in a perverse sort of way. The point is, I ate lutefisk. And it was AWFUL. If you don't know, lutefisk is dried out fish re-hydrated in lye (which I wouldn't think is safe for consumption). It smells, and has the texture of mushy shrimp. Kind of gelatinous and stringy. *Shuddershudder*. 


We got into a small conversation about lutefisk in one of my classes today. Since Norwegians established my school, and lutefisk is a "traditional" Norwegian food, it's served for four days every year in the dining hall around Christmas. Everyone hates it. And very few Norwegians actually eat it, as it's kind of considered peasant food. When you had no other choice, lutefisk seemed pretty okay. Eating it today doesn't really connect us with modern Norwegian culture (and maybe it never did, since it's the food of poor immigrants). Anyway, if it's okay with you, I would like to talk about food that is actually delicious now. 


These banana bars do a fine job of washing the taste of lutefisk or anything else unsavory out of the mouth. Though the recipe called them blondies, they're somewhere between a bar cookie and a cake, and studded with almond slivers and white chocolate! They turned out a bit sweeter than I would like, so next time, cut back on the sugar a bit.

And if someone offers you lutefisk, say no. 


White Chocolate + Almond Banana Bars
adapted from Honey, What's Cooking?

1/2 cup melted butter
1 cup brown sugar
2 eggs
2 tsp vanilla extract
4 ripe, mashed bananas
2 cups flour
1/2 cup chopped almonds

1/2 cup white chocolate chips 

 Preheat oven to 350 degrees. Combine butter and sugar until well blended. Add eggs and vanilla and mix until smooth. Add bananas and blend again. Fold in flour, nuts and chocolate until no dry spots remain, but do not over mix. Pour batter into a greased 9x13 tray. Bake 20-25 or until a toothpick comes out clean.

Tuesday, November 27, 2012

Daring Bakers! Chocolate Coconut Cookies

 Holiday season is the time for sharing and Peta of Peta Eats is sharing a dozen cookies, some classics and some of her own from all over the world with us.

Thanksgiving break is over, and it's back to the daily grind of college. My lucky sister, whose school runs on trimesters, is already off for her six week winter break, and will be heading out to Dubai for a couple weeks to study African-Arab women. So cultured! Even though I only have three weeks left of the semester, it seems like there are so many obstacles to overcome before I get that sweet, sweet Christmas break. But there will be good things in between, and I can't forget that.


For right now, I will think about cookies and puppies (you should adopt a dog. It'll be your best friend forever. I mean, c'mon, look at this lil' guy!) Anticipating Christmas, this month's Daring Baker's Challenge was the 12 Days of Cookies! Fortunately (unfortunately?) we didn't have to make all twelve types, but instead had a choice! I like choices. One of the cookies on the list was rainbow cookies, which I adore, but I've already made them. You should make them soon. They are delightful.


I opted instead for these Chocolate Coconut Cookies, which I think was a great decision. I lurve the combination of chocolate and coconut. The outside cookie is sort of a cross between shortbread and sugar cookie, and the inside is like a coconut macaroon (except better, cause they have cream cheese, nomnomnom). If you make these, you'll likely have extra filling, so make some macaroons! Also also, these totally look like siu mai. They aren't, but you could make some and have a delicious dim sum and cookie dinner!


Chocolate Coconut Cookies
from Baking Glory
Coconut Filling
6oz / 175ml Cream Cheese, softened
¾ cup Sugar
1 Egg Yolk
1 ½ tsp Vanilla Extract
2 ¼ cup Coconut Flakes, unsweetened
 
Cookie Dough
1 ¾ cup All Purpose Flour
⅓ cup Cocoa Powder, sifted
½ tsp Baking Soda
¼ tsp Salt
1 ½ sticks Butter, unsalted
1 cup Sugar
1 Egg
Preparation Instructions
Beat the cream cheese with the ¾ cup of sugar until light and fluffy. Add the egg yolk, and vanilla extract and continue mixing for another minute.
Add the shredded coconut and continue beating until everything is well incorporated.
Preheat oven to 375° F / 190° C.
In a medium size bowl, mix together the flour, cocoa powder, salt and baking soda. In the bowl of a mixer add the butter and sugar and beat together until light and fluffy, add the egg and beat until smooth.
Add the flour mixture to the butter mixture and mix until the mixture is stiff but still pliable.
Using a tablespoon, scoop some of the cookie dough into your hand. Flatten the dough into a circle that’s about 2in to 3in (5cm to 7.5cm) in diameter, add about a teaspoon of the coconut mixture into the middle of it and then fold the sides of the dough but do not seal it at the top.
Repeat this with remaining cookie dough.
Place the cookies on a greased cookie sheet and bake the cookies at 375° F / 190° C for about 18 to 20 minutes
Cool on a wire rack.

Thursday, November 22, 2012

21! With "Hot" Chocolate

Happy Thanksgiving, American readers! and if you don't celebrate Thanksgiving, that's okay. I hope you are having an especially wonderful Thursday. Yesterday, I turned 21. The day was pretty mellow overall. I made a loaf of bread, read a little, played bananagrams, talked to friends....became captivated by my brother's game of Skyrim. My mother made me one of these.


It was a lovely, atypical 21st. I kind of felt obligated to drink something though. There was a pretty bottle of Riesling in the basement that I opened up. I made a face as I took a sip. Dry. Meh. I found it palatable after liberally diluting it with Sprite. I'm a lightweight, haha. 


But ermahgerd, I got a macro lens!!!

But I had to try again! Amaretto and cream is pretty tasty...I browsed around for something a little more exciting and found a recipe for "hot" chocolate. Milk combined with cocoa, spices, and a shot of whiskey? That sounded...pretty delicious, actually. And it was. Mostly because I could hardly taste the whiskey and it was more like spicy chocolate milk. So there you have it. Rebecca doesn't really like booze. Now that that's out of the way, I can get back to baking! 


"Hot" Chocolate
by Heo Yeah Yum

1 tbsp cocoa powder (the kind you bake with, not the Swiss Mix kind)
2 tsp malted milk powder
2 tbsp sugar
1 red Thai chili
1 clove
⅛ tsp grated nutmeg
½ tsp ground cinnamon
1 cup cold milk
1 oz whiskey (or 1½ if you want it boozier, or omit for the kids)
red pepper flakes (for looks!)
 

Directions
In a mortar, grind red chili with clove, nutmeg, cinnamon, releasing the flavors with a pestle.
In the mortar or a cocktail shaker, add the chili and spices with milk, whiskey, sugar, malt powder, and cocoa powder. Shake or stir well.
Pour into a serving glass and sprinkle some pepper flakes over the top.

Saturday, November 17, 2012

Scenes From My Life

Whenever I read blogs, I kind of wonder what bloggers do in the outside world. Y'know, when they're not taking pictures of their perfectly positioned food or telling amazing, relevant stories. I'm not bitter, I just am incredibly aware of how far away I am from that position. I am nowhere near perfect. And as much as I wish I could make something like this my life...I'm not at that point. I have homework, haha. Do you want to see some of the things I do outside of the blog? 


I've grown increasingly fond of rock climbing over this semester. It's so fulfilling for me to set challenges just for myself and feel my strength growing until I can reach my goals. 

This is Jackie. She is a ham.

I volunteer at the humane shelter once a week, feeding cats and cleaning out their cages, and walking and playing with dogs. It makes me sad that there are so many strays/abandoned pets, but I've seen so many get new homes. I really commend those who adopt.


Last weekend I went to a Diwali festival. Previously, I knew next to nothing about the holiday, and I'm so glad I got the opportunity to learn more about it. Also, I tried to make halwa and planned on doing a Diwali blog post, but it failed miserably. Such is life.


Last night was International Food Night, an opportunity to students to visit different honor houses and try foods from all over the world. The house I cooked in had food from Japan and Paraguay. The above is Okonomiyaki, a savory Japanese pancake. I met a lot of new, great people and learned how to cook something I've never made before! 


Here is my latest baking experiment - Cocoa biscuits with brown sugar cinnamon butter. They're not very sweet, and more like a cakey brownie than a biscuit, but I like them. Something simple to fill the baking urge. I'll share the recipe.

So there's my life. Thanks for letting me share with you. 

Cocoa Biscuits with Brown Sugar Cinnamon Butter

2 1/2 cups all purpose flour
1/2 cup unsweetened cocoa powder
1/2 cup brown sugar + 2 tablespoons
4 teaspoons baking powder
1/2 teaspoon salt
1 teaspoon baking soda
1 1/2 sticks (3/4 cup) cold butter, cut into pieces
1 1/4 cup buttermilk
2 teaspoons vanilla extract

Preheat oven to 425 degrees F.
In a large bowl, combine flour, cocoa, sugar, salt, baking powder and soda, and whisk until combined. Using a fork, pastry blender or your hands, add butter pieces to the flour and mix until coarse little crumbles remain. Add buttermilk and vanilla, stirring with a spoon until just combined, not overmixing. Use your hands if needed to bring the dough together.
Use  1/4 cup measure to drop batter onto a nonstick baking sheet, or press dough on a sheet of parchment paper or cutting board, then using a biscuit cutter to shape the dough into rounds. Bake for 12-15 minutes, or until biscuits are set and slightly golden on the edges. Serve immediately.

Brown Sugar Cinnamon Butter
1/2 cup unsalted butter, softened
3 tablespoons brown sugar
1/2 teaspoon cinnamon
pinch of salt
Add all ingredients in a bowl and mash until combined!


Monday, November 12, 2012

Secret Recipe Club - Black and White Cookies

Hello everyone! This post almost perfectly coincides with my two year blogiversary. Wows! Time flies. This blog has become such a big part of my life, and I am so thankful for everyone who has even glanced at this blog. Without you...I dunno what this would be. A diary? Anyway...last year I talked about some highlight posts of the year, and I will now do the same! 

I have two posts I am most proud of - 


Eight Textured Tiramisu and Chocolate Marshmallow Malt Cake. Both of these took many hours and much ingenuity to finish, but it was all worth it in the end! Completing something like this makes me so happy.

Here is the most popular post - 


Vanilla Bean Cupcakes with Raspberry Buttercream. By a long shot. Their popularity puzzles me, since they are so simple. I think the pretty frosting drew people in ^_^


But we will no longer dwell in the past! Today is my last Secret Recipe Club for a long time, since I don't know what my oven situation in Ireland will be. I am SO glad I got assigned to Melissa over at Smells Like Brownies! She's very funny and self deprecating, which I appreciate in a writer. And she had a post about black and white cookies! In which she referenced You've Got Mail! I think we could easily be friends, haha. 

Hello, little frog back there.

Do you know black and white cookies? They're kind of a New York thing and traditionally, like, as big as your face. Cakey like a whoopie pie, but...a little denser? All you need to know is they're delicious. I tried to make these a while back and something weeeeird happened to the chocolate frosting. It all just sank right into the cookie. This time, I felt the chocolate was a little too thick. Someday I'll find that middle ground. 


 On a side note, I had to re-enable word verification on my comments. I'm sorry, cause I know it's annoying, but I was getting so many spam comments that it was driving me nuts. Please don't stop commenting!

Black and White Cookies 

 
Cookie Ingredients:
10 tbsp. unsalted butter, room temperature
1 cup sugar
2 eggs
2½ cups flour
1 tsp. baking soda
1 tsp. salt
⅔ cup buttermilk
1½ tsp. vanilla extract

Vanilla Glaze Ingredients:
2 cups confectioner’s sugar, sifted
½ tsp. vanilla extract
2–3 tbsp. milk

Chocolate Glaze Ingredients:
6 oz. semisweet chocolate chips
3 tbsp. butter
1½ tbsp. light corn syrup

Directions:
Preheat oven to 350°. Line two or three baking sheets with parchment paper.
Beat together butter and sugar in a mixer bowl until pale and fluffy, about 3 minutes. Stir in the lemon zest. Add the eggs, beating until combined, scraping the sides of the bowl at least once.
Meanwhile, whisk together flour, baking soda, and salt in a bowl. Stir together buttermilk and vanilla in a cup.
Mix the flour mixture and the buttermilk mixture alternately into the creamed butter and sugar, beginning and ending with the flour mixture. Mix until smooth, scraping the sides of the bowl between each addition.
Spoon ¼ cups of batter at least 2″ apart onto a the prepared baking sheets (no more than 6 cookies per sheet).
Bake 13–16 minutes, until tops are puffed and golden, and cookies spring back when touched. Remove the parchment with the cookies still on top from the hot cookie sheets and let cool on the counter for 30 minutes.
Prepare the vanilla glaze by stirring together the sifted confectioner’s sugar, vanilla extract, and milk. Add in the milk 1 tbsp. at a time until the mixture is smooth and liquidy, but spreadable.
In a separate bowl, melt the butter and the chocolate in a microwave for about 1 minute. Be careful not to burn the chocolate. Add the corn syrup and stir until smooth.
Glaze the backs of each cookie. First spread vanilla over one half of each cookie, then let it set for a minute or two. Then spread the chocolate over the second half, trying to keep a neat line down the center if possible.
Let the cookies set at room temperature for at least 1 hour. Store in an airtight container, or wrap individually in plastic wrap.


Sunday, November 4, 2012

Chocolate Pumpkin Breads

Well hey there. October passed in a flash, which is somewhat frightening, due to the fact that I am now merely weeks away from my 21st birthday (the age at which my mother will consider me a "real" adult, haha). Also, before I know it, I'll be in Ireland for four months. Of course that's exciting, but there are still so many unknowns right now, and it'll be sad to leave everything familiar. You knew I was going to Ireland, right? I feel like I've mentioned it offhandedly. Here's a picture which totally doesn't capture its behemoth-like proportions. 


Still, this is a booming metropolis compared to my school. 


So anyway, I'm embracing the pumpkin while I still have time. Although I have a sad pumpkin I planned to carve for Halloween sitting in the corner of my room. I hate that I didn't have time to carve it when I promised myself that I would. It's bothering me more than it probably should be. Well...Thanksgiving pumpkin?


These, despite having pumpkin in them, hardly tasted like pumpkin at all to me. Maybe it was more for...moisture? They're pretty homely. The supposed to be appetizing sugar crust looks sort of like...mold. I swear it's not. And someone stole the muffin pan so I had to make them more cinnamon rollish than was intended. And the chocolate chips look A LOT like raisins. Suspiciously so. I assure you they're not. Raisins will never make an appearance on this blog. I promise. Now that I've done such a great job selling these to you...haha, I dunno. Go enjoy your extra hour. 


Chocolate Pumpkin Breads 

by Hungry Girl por Vida 

1/3 cup warm milk
1/3 cup plain pumpkin puree
1/4 cup brown sugar
1 1/2 teaspoons yeast
1 egg, lightly beaten
2 1/4 cups flour
1/2 teaspoon salt
1/2 teaspoon cinnamon
4 Tablespoons unsalted, softened butter
Filling:
3 Tablespoons unsalted butter
1/4 cup brown sugar
8 ounces (1 cup) chocolate chips, or chopped bar
pinch of salt
1/2 teaspoon cinnamon
Egg Wash:
1 egg
1 Tablespoon cream
sugar for sprinkling

In measuring cup, combine milk with yeast and a pinch of sugar. Allow to proof 5 minutes. Stir in the pumpkin and the egg. In a large bowl, combine flour, remaining sugar, salt, and cinnamon. Add the yeast-pumpkin mixture and mix on low to combine (if you have a stand mixer. Otherwise, spoon/hands are cool). Add the butter 2 Tablespoons at a time, mixing until the butter is incorporated before adding the rest. Scrape dough from the paddle, add the dough hook attachment  and knead on medium speed for 10 minutes. The dough will be quite sticky and stringy. Place in an oiled bowl, cover with plastic and allow to rise until doubled in size, about 1 hour.

While the dough rises, make the filling. In the bowl of a food processor, process all ingredients until all of the butter is distributed and you have an uneven, gravely mixture. Or just chop at it violently with butter knives, which is what I did. Set aside.
Liberally butter a 12-cup muffin tin. Or not. A square or rectangle or round pan is cool too. Set aside.
Once dough has risen, turn the dough out onto a well floured surface and gently deflate. Allow to rest 5 more minutes, before rolling the dough out into a large rectangle, the short end measuring about 12 inches–the long edge can be about 18-22 inches. Sprinkle the chocolate filling evenly over the rectangle, it will be bumpy, and begin rolling from the short end all the way up into a 12-13 inch log and pinch to seal. Gently saw off about 1-inch spirals, placing each into a prepared tin. Cover loosely with plastic wrap and allow to rise another hour.

Meanwhile, preheat the oven to 350*F.
Whisk together the egg and cream, brush gently over the tops of the proofed buns and sprinkle liberally with sugar. Bake in the center of the oven for 15-25 minutes. Mine took closer to 25 minutes to bake. Remove from oven and cool on a rack for at least 15 minutes before serving.

Saturday, October 27, 2012

Napoleon!

OoooOoooo! Almost Halloweeeeeen! I'll be...at school. Maybe working at the writing help desk. Maybe having some spookytimes. Maybe I'll steal a child so I can systematically organize their candy into neat piles. That was always the best part. Halloween was great as a kid. I have so many fond memories. Refusing to participate in the Halloween parade in kindergarten (I was a lobster, by the way. How many kids are lobsters these days?), standing awkwardly on people's porches after they'd given me candy because I couldn't see out the eyeholes of my robot costume, and....having all the adults and teenagers who answered the door laugh hysterically when I came around dressed like this. I had a silly upbringing, haha. 


But that is all past, and Halloween in college is different and not really my thing. I think I'd appreciate it more if it was less like this and more like this.  Anyway...time for super challenge food! Check it: 
Our October 2012 Daring Bakers’ challenge was hosted by Suz of Serenely Full. Suz challenged us to not only tackle buttery and flaky puff pastry, but then take it step further and create a sinfully (gah, that woooooord) delicious Mille Feuille dessert with it!

Mille-feuille is also known as custard slice or, more familiar to me, Napoleon. It really has no connection to the tiny conqueror though. 


Puff pastry had been on my list of things to make for a while, so I'm glad I finally had an excuse to take on this labor intensive project. I underestimated how difficult this would be. Rolling and folding and cutting and rolling...okay, also, protip: don't put wax paper in the oven. Just don't do it. The final product was amazing. But so, sooooo hard to cut into neat pieces. I just kind of gave up after a while. Maybe it needed a longer chill time? Bottom line? I have such great respect for bakers who make these everyday for their jobs. I can't imagine how you do it. I aspire to be as skilled as you. 


Napoleon!
(read all steps before proceeding. You wanna give yourself enough time for this)
Puff Pastry: 

Ingredients
1¾ cup (250g) plain/all-purpose flour
Scant ¼ cup (55 ml) (1¾ oz)(50g) unsalted butter, chilled and cubed
1 teaspoon (5ml) (6 gm) salt
½ cup plus 2 tablespoons (5/8 cup)(150 ml) cold water

14 tablespoons (210 ml) (7 oz) (200g) butter (for the beurrage), room temperature
3½ tablespoons (55ml) (30g) plain flour (for the beurrage)

Additional flour for rolling/turning
Directions:
1. Cut the larger quantity of butter into smallish pieces and set aside at room temperature.
2. Put the larger quantity of flour into a bowl with the salt and the cold, cubed butter.
3. Lightly rub the butter and flour between your fingertips until it forms a mealy breadcrumb texture. 

 4. Add the cold water and bring together with a fork or spoon until the mixture starts to cohere and come away from the sides of the bowl.
5. As the dough begins to come together, you can use your hands to start kneading and incorporating all the remaining loose bits. If the dough’s a little dry, you can add a touch more water.
6. Knead for three minutes on a floured surface until the dough is smooth.
7. Wrap in clingfilm and refrigerate for at least 30 minutes.

8. While the dough is chilling, take your room temperature butter and mix with the smaller amount of plain flour until it forms a paste.
9. Place the butter paste between two sheets of clingfilm, and either with a rolling pin or your hands (I found hands easiest) shape it into a 4.5”/12cm square. You can use a ruler (or similar) to neaten the edges.

10. Refrigerate for about 10-15 minutes so the butter firms up slightly. If it’s still soft, leave it a bit longer. If it’s too hard and inflexible, leave it out to soften a touch. You want it to be solid but still malleable.
11. Once the dough has chilled, roll it out on a floured surface into a 6”/15cm square. Place the square of butter in the middle, with each corner touching the center of the square’s sides).
12. Fold each corner of dough over the butter so they meet the center (you might have to stretch them a little) and it resembles an envelope, and seal up the edges with your fingers. You’ll be left with a little square parcel.

13. Turn the dough parcel over and tap the length of it with your rolling pan to flatten it slightly.
14. Keeping the work surface well floured, roll the dough carefully into a rectangle ¼ inch /6 mm in thickness.
15. With the longest side facing you, fold one third (on the right) inwards, so it’s covering the middle section, and ensure that it is lined up

16. Then, fold the remaining flap of dough (on the left) inwards, so you’re left with a narrow three-layered strip.
17. Repeat steps 14, 15, 16.
18. Wrap up in clingfilm and chill for at least 30 minutes.
19. Repeat steps 14, 15, 16 twice.
20. Wrap up in clingfilm and chill again for at least 30 minutes.
21. Repeat steps 14, 15, 16 two final times.
22. Wrap up in clingfilm and refrigerate until needed. The dough keeps a couple of days in the fridge.


Crème Pâtissière:

Ingredients
2 cups (450ml) whole milk
¼ cup (1¼ oz)(35 gm) cornflour/cornstarch
1 cup less 1 tablespoon (200gm) (7 oz) caster sugar
4 large egg yolks (if you’re making the royal icing, reserve two egg whites)
2 large eggs
¼ cup (2 oz) (60gm) unsalted butter, cubed
2 teaspoons (10 ml) vanilla essence

Directions:
1. Mix the cornflour/cornstarch with ½ cup of milk and stir until dissolved.
2. Heat the remaining milk in a saucepan with the sugar, dissolving the sugar and bringing the milk to the boil. Remove from heat.
3. Beat the whole eggs into the cornflour/milk mixture. Then beat in the egg yolks. Pour in 1/3 of the hot milk, stirring constantly to prevent the eggs from cooking.


4. Now, bring the remaining milk back to the boil, and add the eggy mixture, whisking as your pour. Keep whisking (don’t stop or it’ll solidify) on a medium heat until the mixture starts to thicken. 
5. Remove the saucepan from the heat and thoroughly whisk the pastry cream. At this stage the pastry cream can look slightly lumpy, but a good whisking soon makes it smoother.
(If you’re worried about the pastry cream continuing to cook off the heat, you can transfer it to a stainless steel/ceramic bowl.)
6. Beat in the butter and vanilla until fully incorporated.
7. If you haven’t already, pour the pastry cream into a stainless steel or ceramic bowl, and then place clingfilm over the surface to stop a skin forming.
8. Refrigerate overnight to give the pastry cream time to further thicken.


Puttin' it Together!

Ingredients
1 x batch pâte feuilletée/puff pastry (see above)
1 x batch crème pâtissière/pastry cream (see above)

2 ¾ cups (660 ml) (12⅓oz) (350gm) icing sugar
2 teaspoons (10 ml) lemon juice
2 large egg whites
½ cup (2¾ oz) (80gm) dark chocolate

Directions:
1. Preheat oven to moderately hot 200 °C /400°F/gas mark 6.
2. Lightly dust your work space with flour and remove your dough from the fridge.
3. Roll into a large rectangle, the thickness of cardboard. The recipe I followed specified no other dimensions, but I rolled mine to about 12”/30cm x 18”/46cm.

(I found it easiest to start the rolling on the work surface, and finish it off on a large piece of greaseproof paper. That way it’s easier to move the sheets of pastry around.)
4. Cut into three equal pieces and place on a baking tray. If you don’t have space for all three, you can bake them separately.
5. Prick the pastry sheets all over with a fork.
6. Place another sheet of greaseproof paper over the top and then a heavy baking tray. This will prevent the layers from puffing up too much.

( I found my baking trays weren’t heavy enough, so also used a pyrex dish to add more weight. Just ensure that the pastry sheets are evenly weighted down.)

 7. Bake each sheet for about 25 minutes in a moderately hot oven 200 °C /400°F/gas mark 6, removing the top layer of greaseproof paper/tray 10 minutes before the end for the tops to brown. Keep an eye on them and lower the temperature if you think they’re browning too much.
8. Remove the baked sheets from the oven and leave on a wire rack to cool.

9. Once the pastry has cooled, you’re ready to assemble your mille-feuille. Get a sturdy flat board, your pastry and the chilled crème pâtissière from the fridge.
10. Lay one sheet on the board and spread half the crème patisserie evenly over the top.
11. Take the second sheet and place it on top, pressing down lightly with your hands to ensure that it sticks to the filling.
12. Spread the remaining crème pâtissière and place the last sheet of pastry on top, pressing down again. (Don’t worry if there’s some oozing at the sides. That can be neatened later.)
13. Pop in the fridge while you prepare the icing / chocolate.
14. Melt the chocolate in a water bath, stirring periodically. Once melted, transfer to a piping bag (or plastic bag with end snipped), resting nozzle side down in a glass or other tall container.
15. To make the icing, whisk 2 egg whites with 2 teaspoons lemon juice until lightly frothy.
16. Whisk in about (2 cups) 300gm of the icing sugar on a low setting until smooth and combined. The mixture should be thick enough to leave trails on the surface. If it’s too thin, whisk in a bit more icing sugar.
17. Once ready, immediately pour over the top of the mille-feuille and spread evenly. I found that I didn’t quite need all of the icing.
18. Still working quickly, pipe a row of thin chocolate lines along the widest length of your pastry sheet (see below). You can make them as far apart/close together as you like.
19. STILL working quickly (phew), take a sharp knife and lightly draw it down (from top to bottom) through the rows of chocolate. A centimeter (½ inch) or so further across, draw the knife up the way this time, from bottom to top. Move along, draw it down again. Then up. And so on, moving along the rows of chocolate until the top is covered in a pretty swirly pattern. 
20. Once you’ve decorated your mille-feuille, with a clean knife mark out where you’re going to cut your slices, depending on how big you want them to be and leaving space to trim the edges. I got ten out of mine – two rows of five.
21. Chill for a couple of hours to give the icing (etc.) time to set.
22. With a sharp knife, trim the edges and cut your slices.
23. Dig in!