The December 2012 Daring Bakers’ challenge was hosted by the talented
Marcellina of Marcellina in Cucina. Marcellina challenged us to create
our own custom Panettone, a traditional Italian holiday bread!
Oy, I almost forgot to post this, which would have been a shame, because a lot of work went into it! It hit me last night, but I was tooooo tired. All this lounging, you know, it's a lot of work.
I kind of internally cringed when I heard the challenge this month was Panettone (which I have an incredibly difficult time spelling, by the way). To me, it's basically a small step up from fruitcake in terms of deliciousness, fruitcake being at all bottom of the hierarchy of baked goods. I. Do. Not. Like. Dead. Fruit. Unless it's in the hands of Ned the Piemaker (swoon)
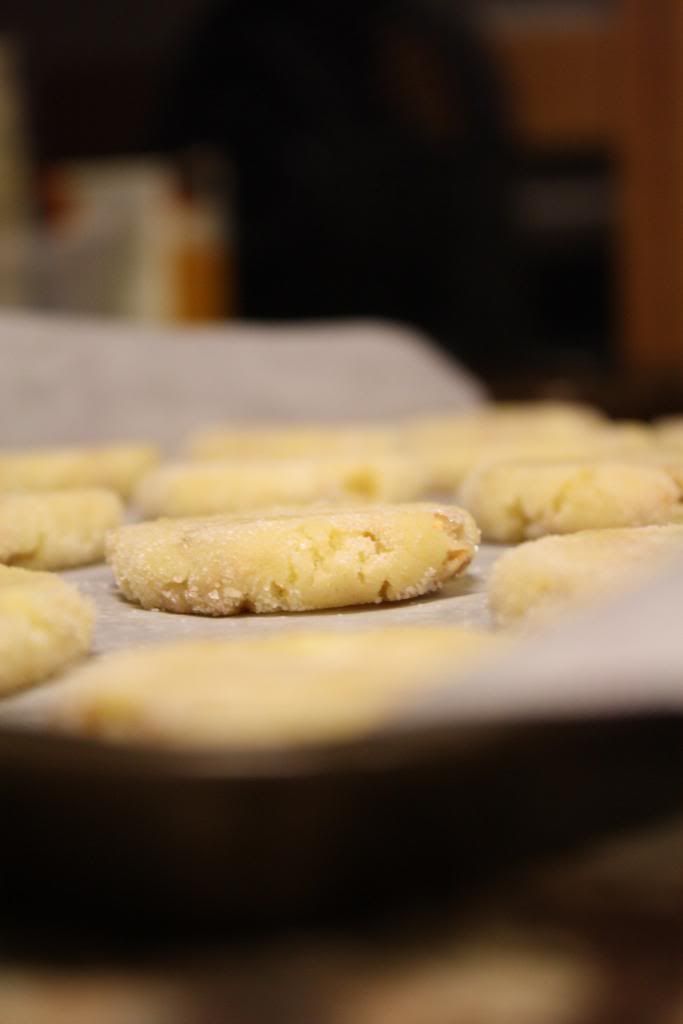
Chocolate and nuts is more my speed. So instead of candied citrus I used almonds, hazelnuts, and chocolate. Oh yeah. It's still not my favorite thing in the world, but I really enjoyed making this bread and have a greater appreciation for the work that goes into it. Know that this is not something you can whip up on a whim...it takes planning and many hours. PS: There's an optional almondy topping you can make, but I decided to go without, and use the extra egg whites to make these gluten free cookies for my sister. Everyone wins.
Ingredients
Sponge
1 satchel (2¼ teaspoons) (7 gm) active dry yeast
1/3 cup (80 ml) warm water
½ cup (70 gm) unbleached all purpose flour
First Dough
1 satchel (2¼ teaspoons) (7 gm) active dry yeast
3 tablespoons (45 ml) warm water
2 large eggs, at room temp
1¼ cup (175 gm) unbleached all-purpose (plain) flour
¼ cup (55 gm) (2 oz) sugar
½ cup (1 stick) (115 gm) unsalted butter, at room temp
Second dough
2 large eggs
3 large egg yolks
2/3 cup (150 gm) (5-2/3 oz) sugar
3 tablespoons (45 ml) honey
1 tablespoon (15 ml) vanilla extract
1 teaspoon almond extract
1 teaspoon (5 ml) (6 gm) salt
1 cup (2 sticks) (225 gm) unsalted butter, at room temp
3 cups (420 gm) (15 oz) unbleached all-purpose (plain) flour; plus up to (2/3 cup) 100 gm for kneading
Filling and final dough
1½ cups (250 gm) (9 oz) almonds and hazelnuts, chopped and toasted
½ cup (75 gm) (2-2/3 oz) semisweet chocolate chips
2 to 3 tablespoons (30-45 ml) (15-25 gm) unbleached all-purpose (plain) flour
Sponge
By hand:
By Hand:
1 cup (140 gm) (5 oz) whole blanched almonds
1 cup (125 gm) (4 ½ oz) confectioners' (icing) sugar
2 tablespoons (18 gm) (2/3 oz) whole wheat flour
3 large egg whites
3 tablespoons (45 ml) good quality extra virgin olive oil
Few drops of almond essence, to your taste
Pearl sugar, flaked almonds or course sugar to decorate
During the final rise, prepare the almond glaze. Process almond, confectioners’ sugar and flour until the nuts are finely chopped and well blended. Mix in the egg whites, oil and essence. Process to combine. It is meant to be thick and glue like. All is well! When the panettone are well risen carefully spread half the mixture over the top. Don’t worry about spreading it to the edges, in fact keep well away from the edges because the glaze will melt and spread. Bake as per the panettone recipe above.
Oy, I almost forgot to post this, which would have been a shame, because a lot of work went into it! It hit me last night, but I was tooooo tired. All this lounging, you know, it's a lot of work.
I kind of internally cringed when I heard the challenge this month was Panettone (which I have an incredibly difficult time spelling, by the way). To me, it's basically a small step up from fruitcake in terms of deliciousness, fruitcake being at all bottom of the hierarchy of baked goods. I. Do. Not. Like. Dead. Fruit. Unless it's in the hands of Ned the Piemaker (swoon)
Chocolate and nuts is more my speed. So instead of candied citrus I used almonds, hazelnuts, and chocolate. Oh yeah. It's still not my favorite thing in the world, but I really enjoyed making this bread and have a greater appreciation for the work that goes into it. Know that this is not something you can whip up on a whim...it takes planning and many hours. PS: There's an optional almondy topping you can make, but I decided to go without, and use the extra egg whites to make these gluten free cookies for my sister. Everyone wins.
Chocolate and Nut Panettone (makes two large)
Sponge
1 satchel (2¼ teaspoons) (7 gm) active dry yeast
1/3 cup (80 ml) warm water
½ cup (70 gm) unbleached all purpose flour
First Dough
1 satchel (2¼ teaspoons) (7 gm) active dry yeast
3 tablespoons (45 ml) warm water
2 large eggs, at room temp
1¼ cup (175 gm) unbleached all-purpose (plain) flour
¼ cup (55 gm) (2 oz) sugar
½ cup (1 stick) (115 gm) unsalted butter, at room temp
Second dough
2 large eggs
3 large egg yolks
2/3 cup (150 gm) (5-2/3 oz) sugar
3 tablespoons (45 ml) honey
1 tablespoon (15 ml) vanilla extract
1 teaspoon almond extract
1 teaspoon (5 ml) (6 gm) salt
1 cup (2 sticks) (225 gm) unsalted butter, at room temp
3 cups (420 gm) (15 oz) unbleached all-purpose (plain) flour; plus up to (2/3 cup) 100 gm for kneading
Filling and final dough
1½ cups (250 gm) (9 oz) almonds and hazelnuts, chopped and toasted
½ cup (75 gm) (2-2/3 oz) semisweet chocolate chips
2 to 3 tablespoons (30-45 ml) (15-25 gm) unbleached all-purpose (plain) flour
- Mix the yeast and water in a small bowl and allow to stand until creamy. That’s about 10 minutes or so. Mix in the flour. Cover with plastic wrap and allow it to double in size, about 20-30 minutes.
By hand:
- Mix the yeast and water in a large bowl and allow to stand until creamy. Again, about 10 minutes or so
- Mix in the sponge and beat well with a wooden spoon
- Stir in the eggs, flour and sugar.
- Mix in the butter well
- This should only take about 5 – 6 minutes
- Cover with plastic wrap and allow double in size, about 1 – 1 ¼ hours
- In the mixer bowl, mix together the yeast and water and allow to stand until creamy. Again, about 10 minutes or so
- With the paddle attached mix in the sponge, eggs, flour, and sugar.
- Add in the butter and mix for 3 minutes until the dough is smooth and even. Cover with plastic wrap and allow double in size, about 1 – 1 ¼ hours
By Hand:
- Be sure to have your dough in a large bowl as above.
- With a wooden spoon mix in eggs, egg yolk, sugar, honey, vanilla, essences/extracts and salt.
- Mix in the butter.
- Then add the flour. Stir until smooth.
- At this stage the dough will seem a little too soft, like cookie dough.
- Turn it out and knead it on a well-floured surface until it sort of holds its shape. Don’t knead in too much flour but you may need as much as 2/3 cup (100 gm). Be careful the excess flour will affect the finished product.
- With the paddle mix in thoroughly the eggs, egg yolks, sugar, honey, vanilla, essences/extracts, and salt.
- Mix in the butter until smooth.
- Add the flour and slowly incorporate.
- At this stage the dough will seem a little too soft, like cookie dough.
- Replace the paddle with the dough hook and knead for about 2 minutes. Turn out the dough and knead it on a well-floured surface until it sort of holds its shape.
- Don’t knead in too much flour but you may need as much as 2/3 cup (100 gm). Be careful the excess flour will affect the finished product.
- Oil a large bowl lightly, plop in your dough and cover with plastic wrap
- Now we need to let it rise until it has tripled in size. There are two ways to go about this.
- Rise in a warm place for 2 – 4 hours
- Or find a cool spot (64°F -68°F) (18°C – 20°C) and rise overnight
- Or rise for 2 hours on your kitchen bench then slow the rise down and place in the refrigerator overnight.
- Combine all filling ingredients and mix well.
- Divide dough in half and press out one portion into an oval shape
- Sprinkle 1/4 of the filling over the dough and roll up into a log
- Press out again into an oval shape and sprinkle over another quarter of the filling
- Roll into a log shape again.
- Repeat with the second portion of dough
- Shape each into a ball and slip into your prepared pans, panettone papers or homemade panettone papers.
- Cut an X into the top of each panettone and allow to double in size.
- Rising time will vary according to method of first rise. If it has been in the refrigerator it could take 4 hours or more. If it has been rising on the kitchen bench in a warm place it should be doubled in about 2 hours.
- When you think your dough has only about 30 minutes left to rise preheat your oven to moderately hot 400°F/200°C/gas mark 6 and adjust your oven racks
- Just before baking carefully (don’t deflate it!) cut the X into the dough again and place in a knob of butter.
- Place your panettone in the oven and bake for 10 minutes
- Reduce the heat to moderate 350°F/180°C/gas mark 4 and bake for another 10 minutes
- Reduce the heat again to moderate 325°F/160°C/gas mark 3 and bake for 30 minutes until the tops are well browned and a skewer inserted into the panettone comes out clean.
- Cooling your panettone is also important. If you have use papers (commercial or homemade) lie your panettone on their side cushioned with rolled up towels. Turn gently as they cool. If you have used pans cool in the pans for 30 minutes then remove and cushion with towels.
- Panettone can also be cooled suspended. How to do this? Firstly you need to use papers (commercial or homemade), insert clean knitting needles into the bottom of the panettone in a X shape. Flip over and support the knitting needles on the edges of a large saucepan with the panettone suspended within the saucepan. Yep, a lot of trouble and I didn’t really find that much difference – maybe I took too long to insert the needles.
Almond Glaze for Panettone
Ingredients1 cup (140 gm) (5 oz) whole blanched almonds
1 cup (125 gm) (4 ½ oz) confectioners' (icing) sugar
2 tablespoons (18 gm) (2/3 oz) whole wheat flour
3 large egg whites
3 tablespoons (45 ml) good quality extra virgin olive oil
Few drops of almond essence, to your taste
Pearl sugar, flaked almonds or course sugar to decorate
During the final rise, prepare the almond glaze. Process almond, confectioners’ sugar and flour until the nuts are finely chopped and well blended. Mix in the egg whites, oil and essence. Process to combine. It is meant to be thick and glue like. All is well! When the panettone are well risen carefully spread half the mixture over the top. Don’t worry about spreading it to the edges, in fact keep well away from the edges because the glaze will melt and spread. Bake as per the panettone recipe above.


